|
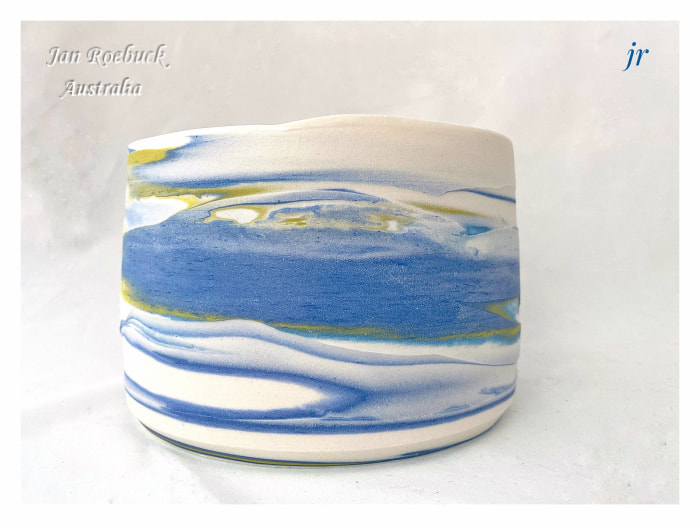
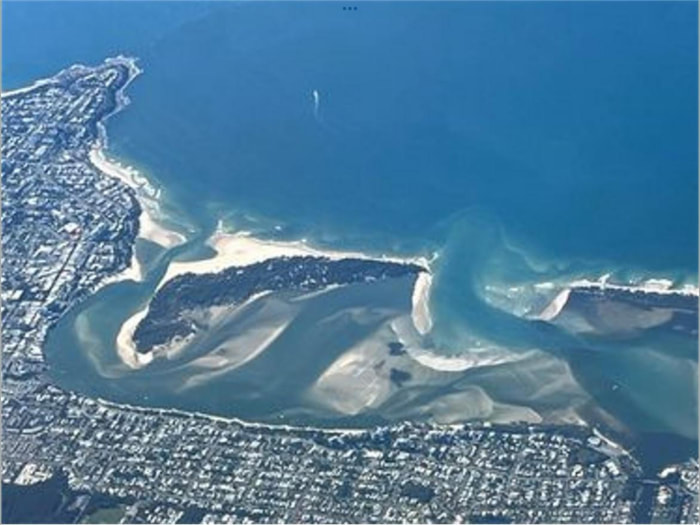
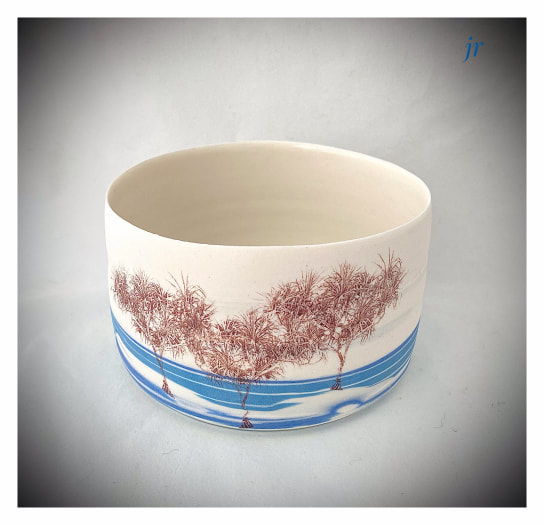
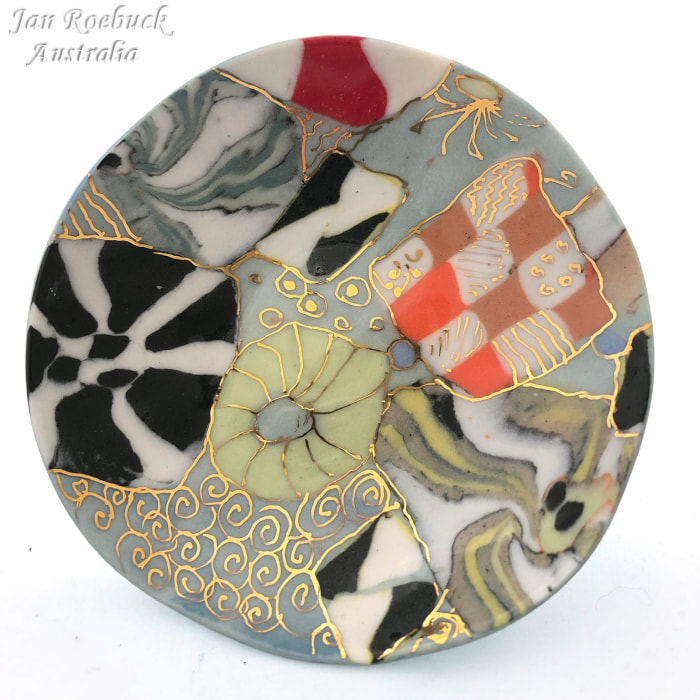
Cyclones in Australia and that southern part of the world are not uncommon. Sometimes these storms with high winds and tides may even change some of the landscapes, and that is exactly what inspired Jan to use her ceramic skills to show what she experienced when tropical cyclone Seth hit Queensland.
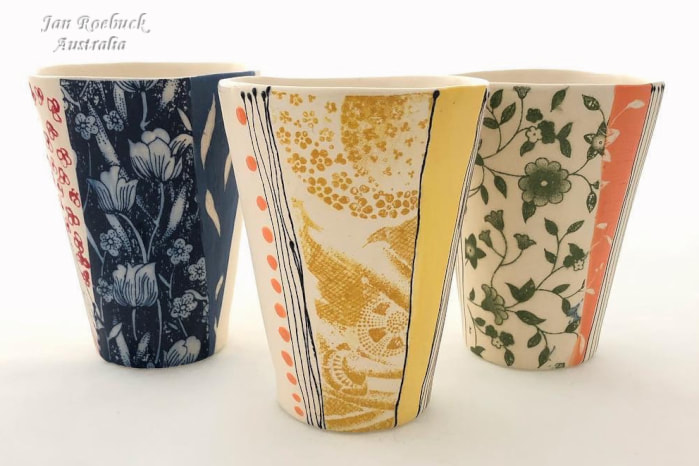
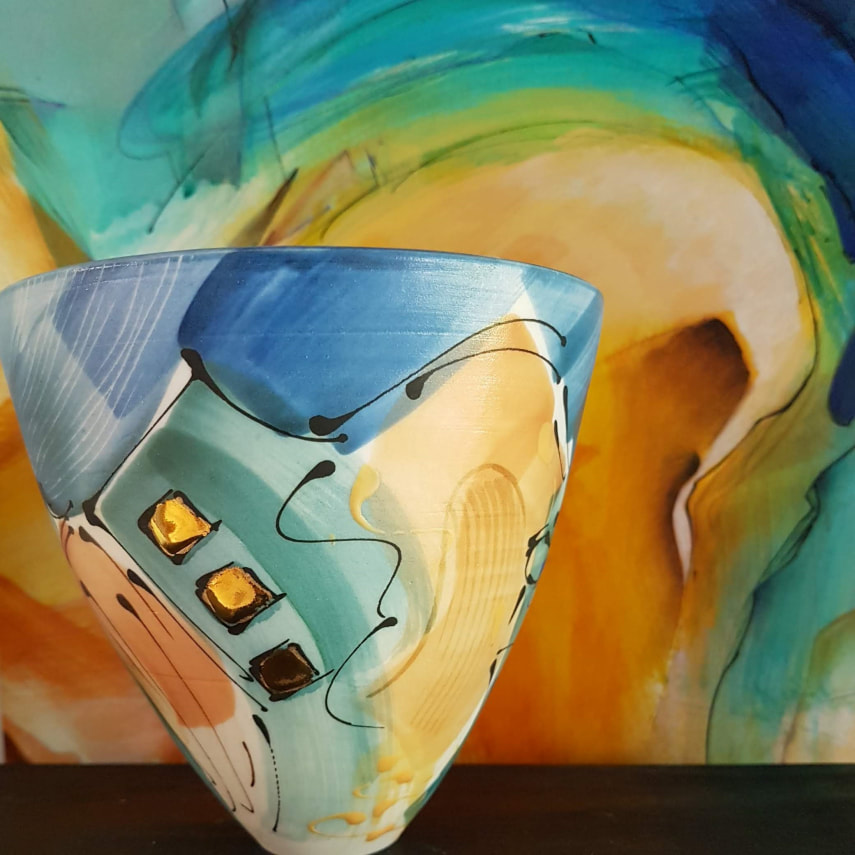
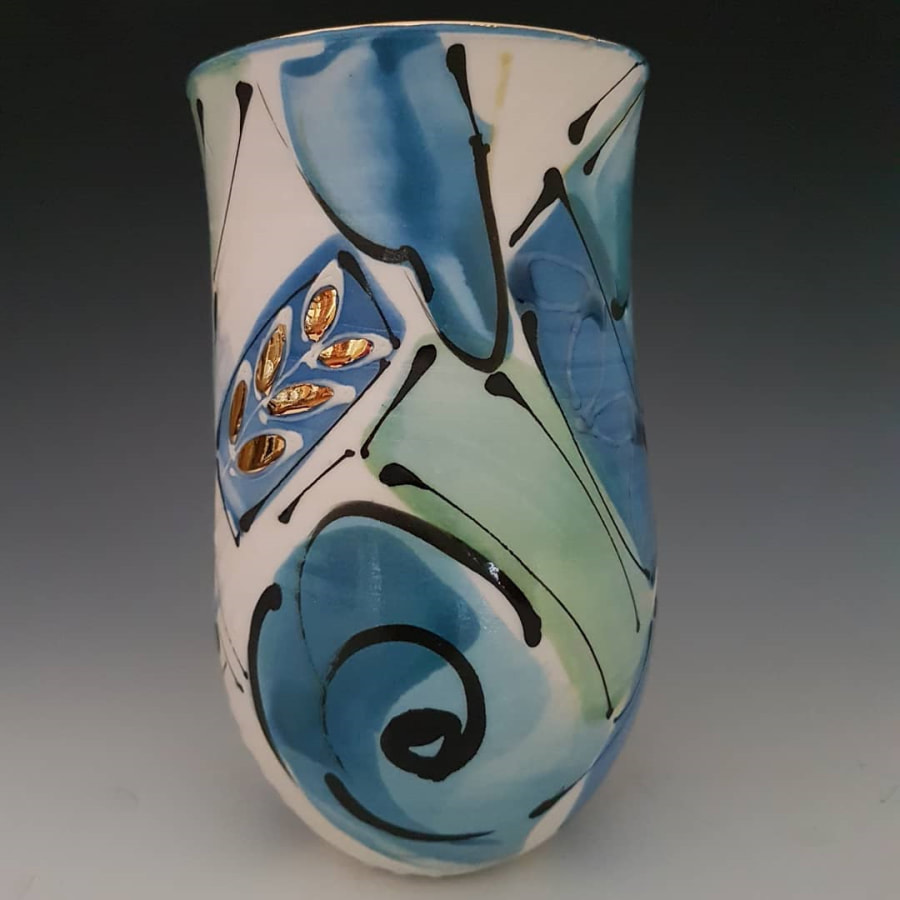
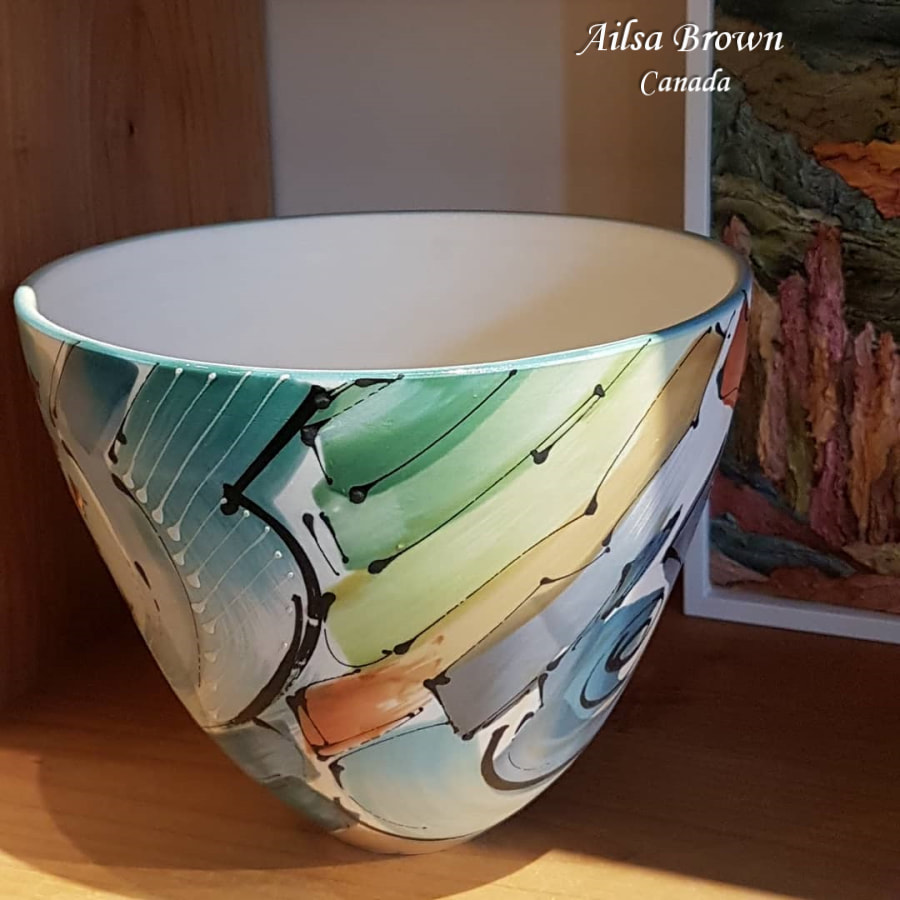
Here is Jan in her own words. I live on the Sunshine Coast in Queensland in Australia where we get the effects of tropical cyclones… mainly rain and high tides. In January, 2022 we were hit by Cyclone Seth which brought with it a very rough sea. It hit Bribie Island opposite Golden Beach causing a breakthrough of this uninhabited tip of the Island with hundreds of Pandanus trees being uprooted and washed away down the Passage. The small breakthrough In January grew from the first photo from a few metres to over 800 metres in the second photo taken in July. The sand patterns and channels have changed so much that in low tide you can now walk across. The southern end of the Island goes down to Brisbane (some 100 km) - the passage of water between is known as Pumicestone Passage due to the small pumice stones that still wash ashore. Although Cyclone Seth was a tropical cyclone for a little over 24 hours in the Coral Sea, its entire track lasted 15 days. There was severe flooding in southeast Queensland and hazardous surf along the southern Queensland as well as the northern New South Wales coast. The low was responsible for onset of the monsoon over Darwin and the Top End. Jan Roebuck is one of the TeachinArt online students from Australia. She completed the Understanding Porcelain (Aug 2014) class with Antoinette Badenhorst, and the Colored Clay (Oct 2018) class with Curtis Benzle. Here are some of the other porcelain creations of this talented porcelain artist.
1 Comment
CANVAS AND CLAY ART
Her social media: Facebook alsajbrown | Instagram @ailsajbrownart | Website www.ailsajbrown.com Other links:
See the TeachinArt online workshops Find out about our online instructors Look at our students work
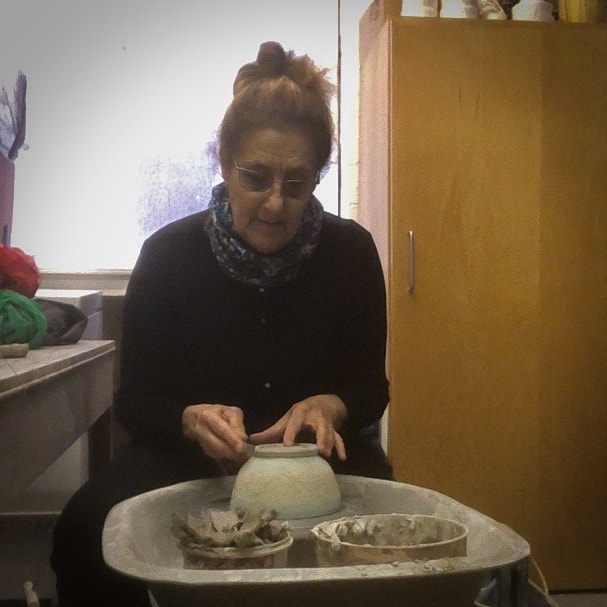
"I have done ceramics since the age of 15. I always loved working with clay, but I also wanted to learn to draw and paint and gain a substantial knowledge of art history. So, I studied art and design, fine art and history of art. I teach drawing, painting and hand-built ceramics and I have owned a kiln for 13 years. I have worked with porcelain for four to five years now but with other stoneware and earthenware clays for a lot longer."
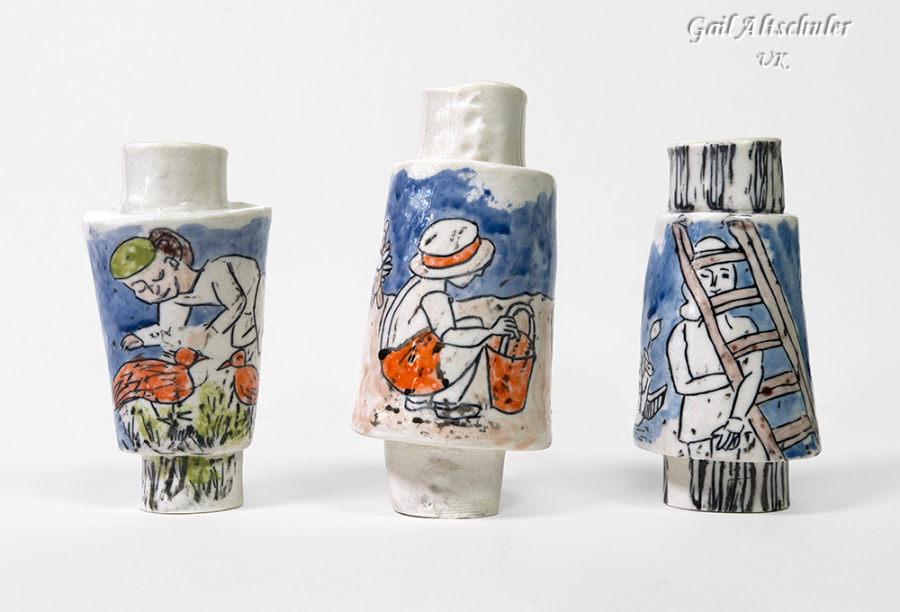 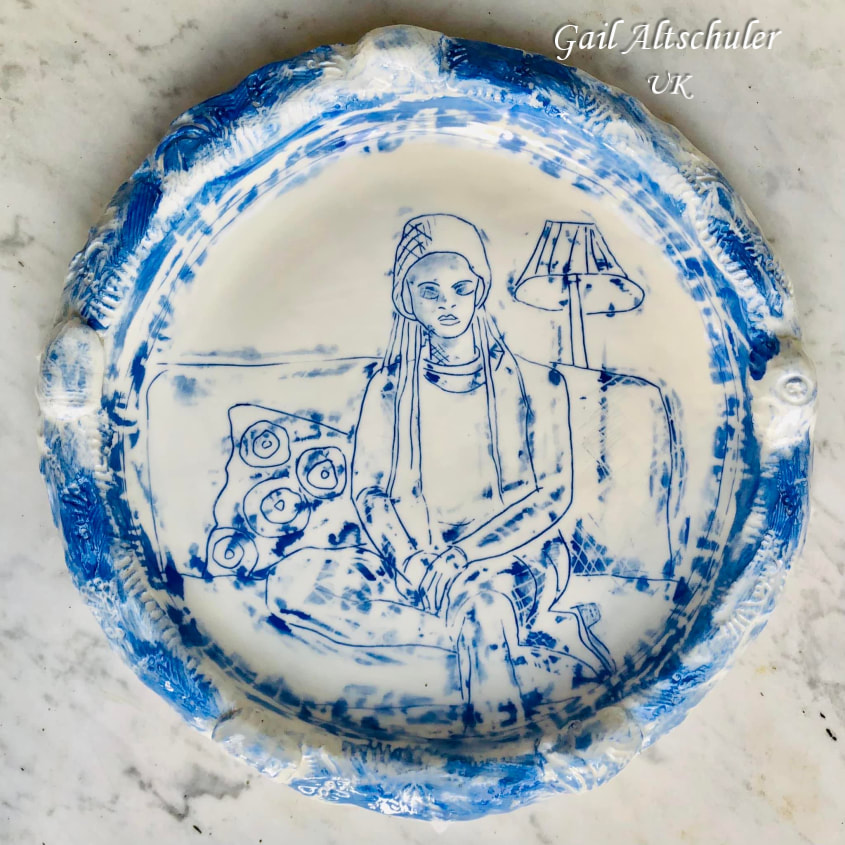
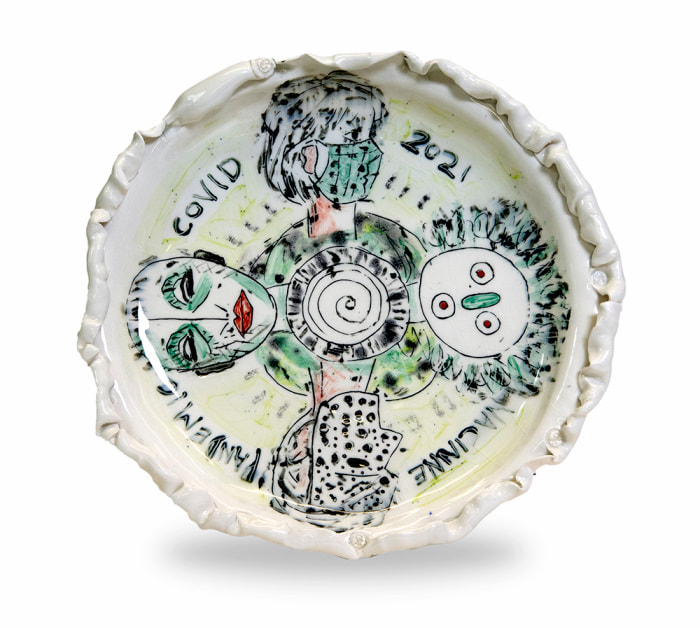
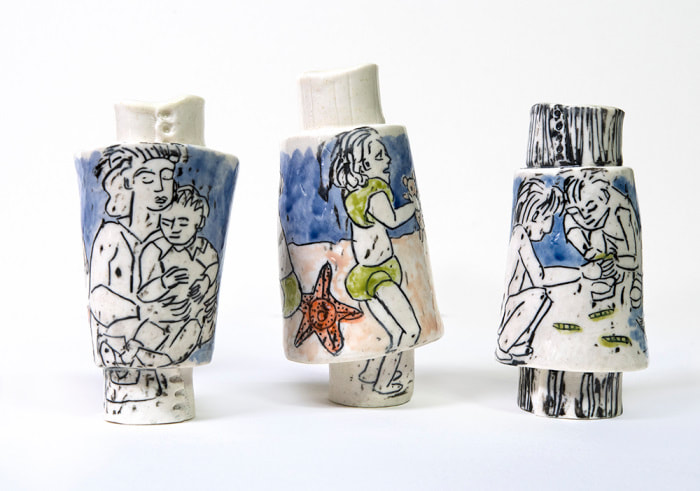
“I aim to blur the lines between Fine Art and Ceramic Craft. I use clay and porcelain, as my canvas, creating sculptural slab-built vessels and illustrated plates. The themes include masks from different cultures, musicians, at the café, at the beach, at the Met and conversations across time.” – Gail Altschuler
Links:
Understanding porcelain online workshop by Antoinette Badenhorst. Online workshops at TeachinArt.
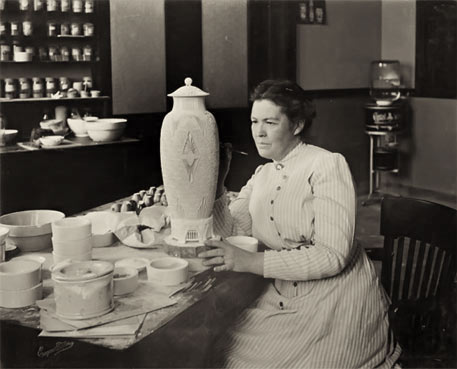
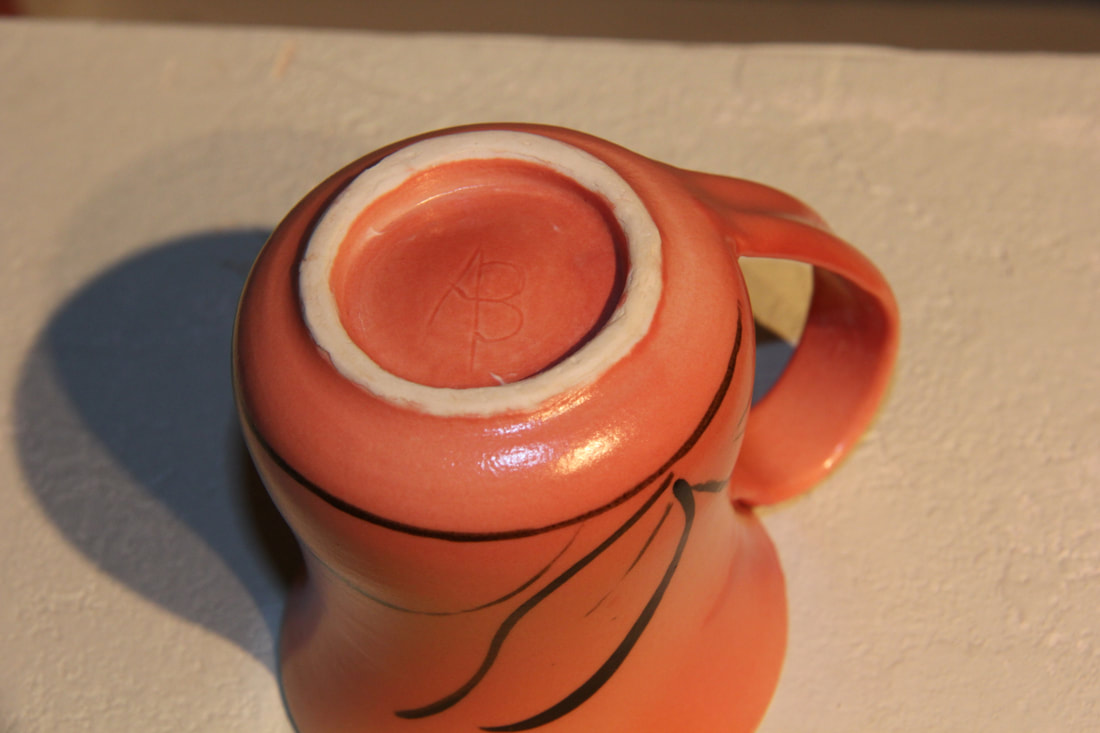
Another important thing to consider is if it is at all worth it to fix the crack. If it will take you longer to fix the piece than it would take you to make a new one, then it will be penny-wise-pound-foolish to fix it. It is also good to learn when a crack is really not worth the effort and when it may make a real difference. Some cracks are more worthy to fix than others. A piece that is strictly for decoration and will not get confused for a utilitarian piece, is a perfect piece to fix, both artificially and structurally; that is with or without ceramic materials. In fact, a crack that distract from the beauty, should be fixed. However, when the utilitarian strength of a piece, for instance the handle of a teapot, is weakened by the fixing process, it is not worth it to put your reputation as a ceramic artist on the line. All potters must at least fix one crack in their lifetime, or else they have not had the “full clay experience” - I say that tongue-in-the-cheek. However, there was one potter known, not only for fixing cracks, but she changed the whole perspective on American porcelain as she was recognized as the most important United States ceramic artist in the 20th century (Arts and Antiques magazine - March 2000).
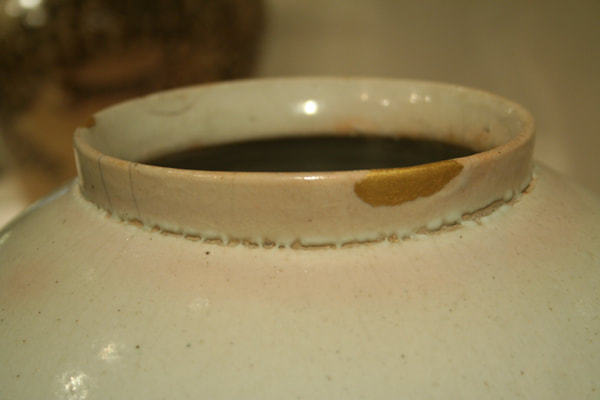
Adelaïde Alsop Robineau was born during the last remnants of the industrial revolution in the United States and growing up, she became a painting artist. But as it often went with artists during these times, she worked also as a china painter on ceramics to help support her family. One of very few women in the USA to study and practice pottery at the time, she worked primarily in porcelain, experimenting with American clay to create a true high-fire porcelain. It took her over 1,000 hours to make, but as it often happens with porcelain, there were small cracks when it came from the kiln. Taxile Doat, her teacher advised her to trash the piece, as it appeared to be irreparable. She did not give it up and spent hours grinding bisque to powder, mixing it with some powdered glaze, and filled the cracks. After re-glazing and re-firing, the piece was pulled from the kiln with no signs of cracks or reparation. How does Antoinette fixes cracks in her pots?Here is how I fix cracks: Mix up some paper clay from your clay body. Add a few drops of clear glaze and some finely grounded bisque from the same clay as the mug. Clean any dust away and add some clear glaze on the chip. As it dries, it may open up some cracks again, but keep filling it with more paper clay. Remember paper clay must still shrink to catch up with the rest of the body, so it needs enough filler that will not shrink that much.
When you put it back in the kiln, put some silica on the shelf under the piece to prevent possible sticking. If it is a foot rim, you may have to sand it when it comes out. Links: Porcelain by Antoinette E-courses (online workshops) at TeachinArt Preview our e-courses Demonstrations and tips Tags:
#potterytips #faultsandremedies #fixingfaults #teachinart #ceramicschool #paperclay #paperporcelain
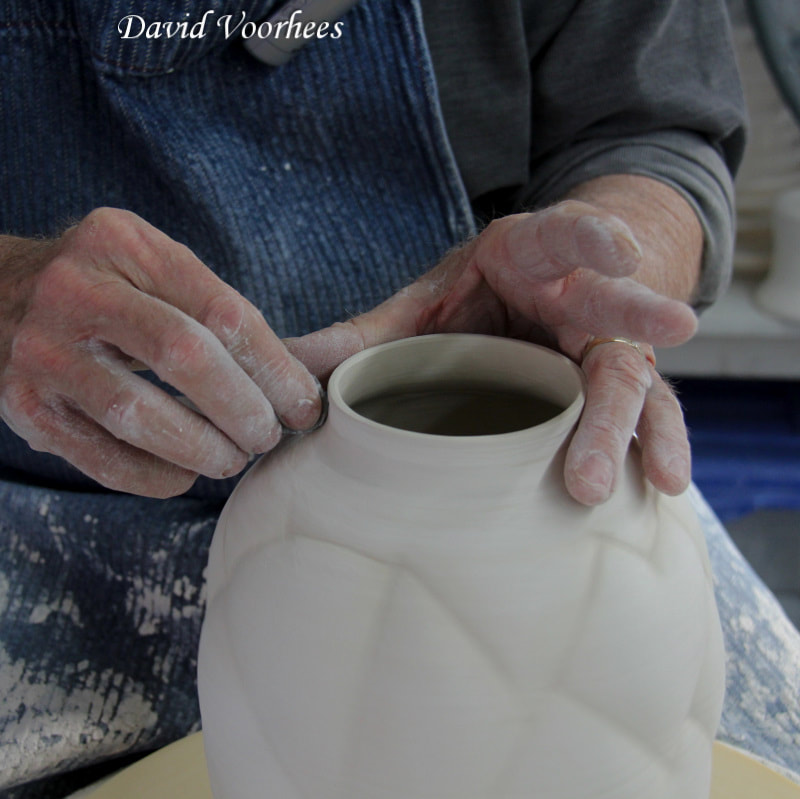
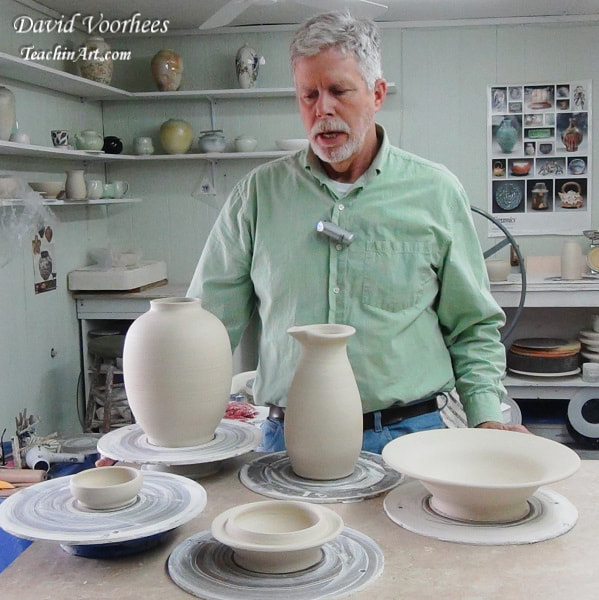
David Voorhees is a professional potter from North Carolina who works with porcelain. He presents an online workshop (Porcelain tips for wheel pottery) at TeachinArt online school of art and demonstrates in the e-course how to do spiral wedging. This video clip is a short preview of the six weeks online class with David.
What is wedging? It is a clay term for kneading and is used to remove air bubbles or air pockets from the clay. Any air trapped in the clay, makes the centering of the clay on a potters wheel so much more difficult and if an air pocket is trapped inside clay and you fire it in the kiln, it can explode. Wedging helps to spread moisture evenly throughout the clay which helps with easier centering on the wheel. Even if you do not use a potter's wheel and only work with hand building, then wedging is just as important. Many potters have experienced the shock when they opened the electric kiln and see that one of their pots (with air trapped air inside) exploded and messed up all the surrounding pots. The spiral wedging technique is handy when you have to wedge or knead large clay batches. It is also called the Japanese wedging or kneading. Some potters only use the spiral method. We will post later other wedging techniques.
Links
Online art workshops (e-courses) Demonstrations, tips & techniques Art instructors Preview e-courses
Tags:
#wedgingclay #spiralwedging #teachinart #teachingartist #ceramicschool #potteryschool #kneadingclay
Centering of clay on the wheel is one of the most crucial parts of wheel throwing. This is the time to get the clay particles in the right place and to build on to the wedged clay process. If the clay is not centered correctly, then the pulling-up of the walls becomes a nightmare.
There are some potters who do not know that you can set the wheel to spin clockwise or anti-clockwise. Right handed potters should let the wheel spin anti-clockwise and left-handed throwers should switch the direction of the wheel head to a clockwise motion. Throwing on the wheel is easier if you use technique instead of force. It is easier to get your arm locked on your upper leg and let you leg do the pushing and steadying instead of just your arms. This is a video clip from the Understanding Porcelain e-course by Antoinette Badenhorst. TeachinArt brings ceramic workshops into the studio of potters around the world, and is the bridge between college students and hobby potters.
Other interesting links on our online school website:
Tags:
#centeringclay #wheelthrowing #potterytips #teachinart #wheelpottery #clayshares #ceramicschool #virtualclass
Nan RothwellNan Rothwell is a professional, functional potter from North Carolina who have 40+ years ceramics experience. She is the online instructor for the take your wheel throwing to the next level e-course at TeachinArt. She shares tips and techniques in her online class with potters and shows them how to move into advanced throwing with ease.
When you attach a handle to a mug, teapot, jug or any other clay wall, cracking of the handle is one of the big problems. When you add wet clay to a dry pot, the chances are very good for cracking at the handle. There are several reasons why handles crack loose from a mug, but this tip from Nan Rothwell may help you prevent some of your cracking reasons in the future.
Other links:
Learn pottery online (E-courses) See our other demonstrations, tips & techniques Preview e-courses
Tags:
#pottery tips #claymugs #ceramicschool #clayshares #teachinArt #makingmugs #teachingpottery Wheel throwing tips from David VoorheesDavid Voorhees is a functional potter from North Carolina with over 40 years experience in ceramics. He is the instructor of the online workshop Porcelain Tips For Wheel Pottery at TeachinArt. Several potters have problems with opening and pulling up consistent cylinders or bowl forms. Some of the problems are uneven walls with too much thickness at the bottom, uneven rims, and slumping clay.
These are all common problems associated with skill development and learning to use porcelain on the wheel. Porcelain does require a bit more of us as craftsmen. It needs to be prepared better and we need to limit the amount of time it is allowed to be fully wet during forming. Here are my suggestions for those experiencing these common problems:
Links: Online workshops at TeachinArt Art instructors at TeachinArt Preview the e-courses presented at the art school Demonstrations & tips by our instructors and other artists and crafter's Tags:
#potterytips #wheelthrown #wheelthrownporcelain #wheelthrowingtips #ceramicschool #teachinart #wedgingclay #wedging
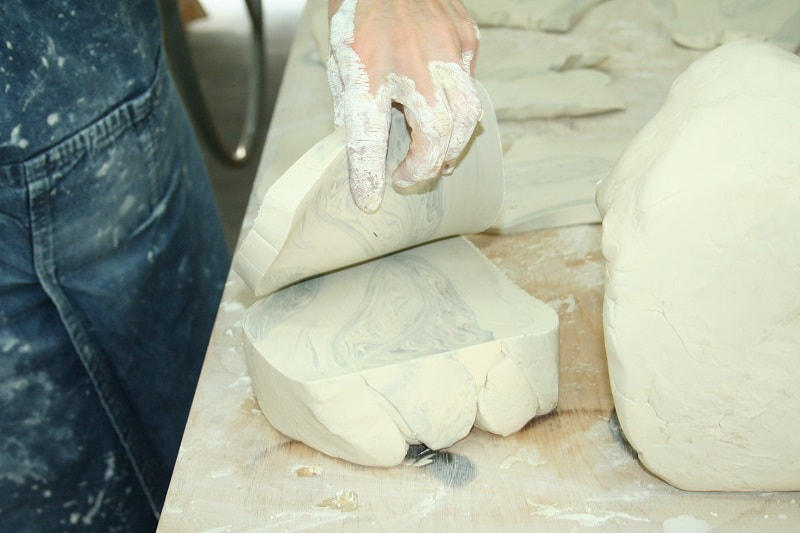
Antoinette Badenhorst explains how to do the bulls head wedging technique in her online workshop Understanding Porcelain. This is a video clip from her six weeks online class. It all starts with preparing the clay before your start with any wheel throwing or handbuilding projects.
Wedging clay is a hot topic to discuss among potters. Some believe that spiral wedging is the best way for preparing the clay, while others will not even think about moving away from the bull's head or ram's head wedging technique. Some ceramic artists even differ about the spelling of the wedging technique - is it bullshead, or maybe bull's head or even just bulls head - and the same argument is used for the ramshead method. Then we also have other techniques like slam wedging and there may be more, but we will discuss that later.
Some ceramic scholars learn that a chunk or block of clay is cut into two pieces with the shape of a wedge. The top one is lifted from the lower one, turned over and slammed onto the wedge that remained on the wedging table. This process is repeated until there are no more air pockets in the clay. The wedging process helps to get the clay uniform in plasticity, texture and color. Roughly 20 wedging's or kneading is enough to prepare the clay.
Other links:
How to do spiral wedging (David Voorhees) How to center clay on the pottery wheel (Antoinette Badenhorst) Demonstrations, tips & techniques E-course (online workshops)
Tags:
#claywedging #wedgingclay #wedgeclay #potterytips #teachinart
When is the right time to use blunt tools and when should you use sharp trimming tools? How dry should the pot be before you can start with the trimming? When is the best time in the drying stage to start with the trimming process? Is there a right and wrong way for trimming on the wheel? Which is the best trimming tool? How to trim a foot rim? How to trim porcelain?
All of these are valid questions by potters and these problems are all addressed in the online workshops at TeachinArt, the online art school where potters can see close-up demonstrations of each process and can learn the best techniques in the comfort of their own place and own time.
Links:
E-courses (online workshops) Demonstrations, tips & techniques Preview E-courses Our Art Instructors
Tags:
#trimmingclay #wheeltrimming #trimmingtools #trimmingclay #teachinart #trimmingtips #potterytools
Pinching clay is one of the underestimated techniques among potters. Many believe that pinching is just for beginners, but if you master pinching skills, then you can use this even when you are working on the potters wheel.
There are challenges with pinching and sometimes a pinch pot gets completely out of control. This video shows an easy way of how to do in-pinching to get the pinch pot back under your control. With pinching, you can develop "eyeballs on your fingers", as Antoinette always tells her students. Clay pinching skills will help you to judge the thickness of a wall or a bottom on a pot - helping you with trimming. Antoinette Badenhorst presents an online workshop where she teaches potters how to pinch a complete functional teapot with clay (Pinching teapots for Beginners).
Tags:
#Antoinetteporcelain #teachinart #pinchingclay #pinchingpottery #pinchingbowls #potteryclasses #potteryworkshops #teachingartist #Mississippiartist #handbuildpottery #ceramicschool #learnpottery #teachingceramics Mark Goudy was named the Emerging Artist in Ceramics Monthly magazine of May 2010. He completed two online classes at TeachinArt, Porcelain handbuilding with Antoinette Badenhorst, and Colored Clay with Curtis Benzle. 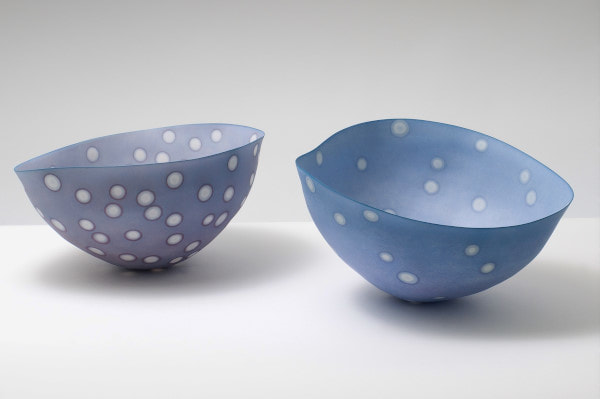 His work was selected for collections in
My formal education lies mostly in science and engineering: a Bachelor of Science in Biology from the University of Oregon, and a Master of Science in Electrical Engineering from California State University in San Jose. I did take various art classes along the way, but it wasn't until much later in life that I even thought about pursuing a career in ceramics. My interest in music and my hobby of building electronic music synthesizers propelled me into the study of electrical engineering in my late 20s. I ended up working for twenty years as a logic design engineer in the computer graphics industry (including Pixar, Silicon Graphics, nVidia.) 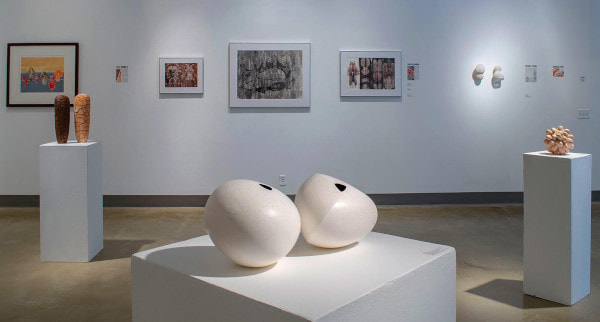 After my mother passed away in 2004, my wife Liza had the idea for us to take a raku class at a local Bay Area adult school, an homage to my mother's creative spirit. Following a twenty-year career working as an engineer in the virtual world of computer chip design, I found the process of clay work to be a cathartic experience - resonating at some deep unconscious level. The physical nature of handbuilding unique pieces from this plastic medium was immediately satisfying. Soon I was applying my analytical and problem-solving skills to the multivariate issues that surfaced in the clay studio, and exercising my right brain to construct forms in a totally intuitive way. My approach to ceramics stems from the intersection of my love of the geometries of nature and abstract minimalist art. My mission as an artist is first to create a coherent visual language, and then learn to speak in that language. For me, certain forms evoke a sense of quiet stillness and mystery, and exist in a dimension apart from language. I don't fully understand it.
My current process is to handbuild ceramic forms, joining sections of curved parabolic surfaces that I create using purpose-built plaster hump molds. After a series of scraping, paddling, and shaping transformations, the models are bisque fired and used to make multipart plaster molds. The final works are slipcast, using various clay bodies that I have created. I see slipcasting as a way to translate one clay body, which is optimized for building, into another clay body with different properties - of lightness or translucency for instance. Sometimes I burnish earthenware forms to impart a smooth surface with a subtle grain pattern. For other works, there is a lot of wet-sanding to refine and even out the surface. I use no glazes in my work. Instead I have developed techniques for adding color and pattern through the use of metal salts, following the lead of renowned Norwegian ceramic artist Arne Åse. These compounds are the water-soluble form of the same metals used to color traditional ceramic glazes. After painting on, they soak into the bisque-fired clay, interact with each other, and become a permanent part of the surface after firing. All my work so far is low-fired, at cone 01 or below.
Many thanks to Antoinette Badenhorst and her e-course on Porcelain handbuilding to help me understand the unique qualities of this beautiful material. Links: E-courses (online workshops) Preview E-courses Demonstrations, tips & techniques Our Art Instructors Tags:
#teachinart #MarkGoudy #translucentporcelain #porcelainhandbuilding #Californiaartists #ceramicartists #solublesalts #handbuildceramics #raku #ceramicsmonthly #clayshares
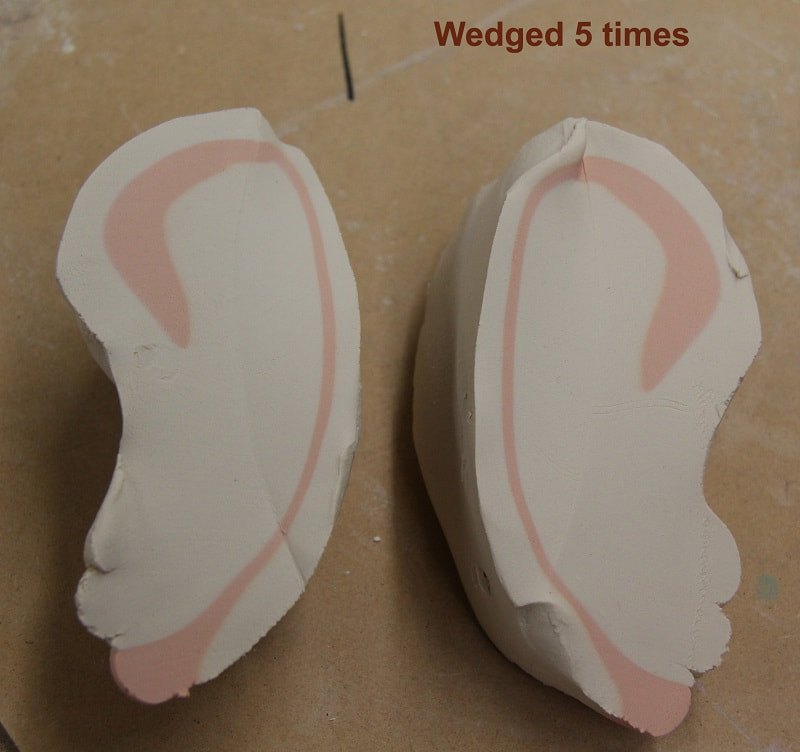
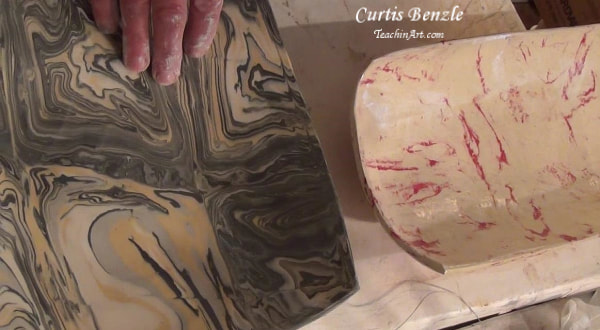
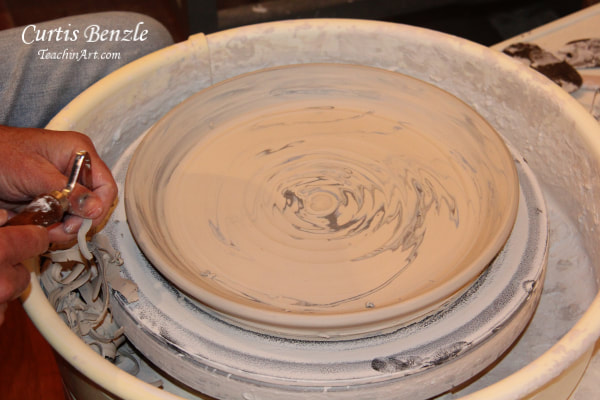
Neriage (neriagi), also known as agateware, is a Japanese word that describes the process of blending two, three or four colors of clay in a random fashion. The color range can be very complex or completely random. The clay is not glazed and gives an organic, marble look when fired.
Curtis Benzle is a professional artist and teacher with more than 40 years experience in ceramics. His fine translucent porcelain work is included in many private and public collections. Curt presents the colored clay e-course at TeachinArt.
Links:
E-courses (online workshops) at TeachinArt Demonstrations, tips and techniques (Tips shared by teachers of TeachinArt) Preview e-courses (take a quick peek into our online workshops) Art Instructors (Meet our online art instructors) Colored clay e-course (See more of the online workshop with Curtis Benzle)
Tags:
#neriage #agateware #coloredclay #teachinart #curtisbenzle #colorblending #onlineschool
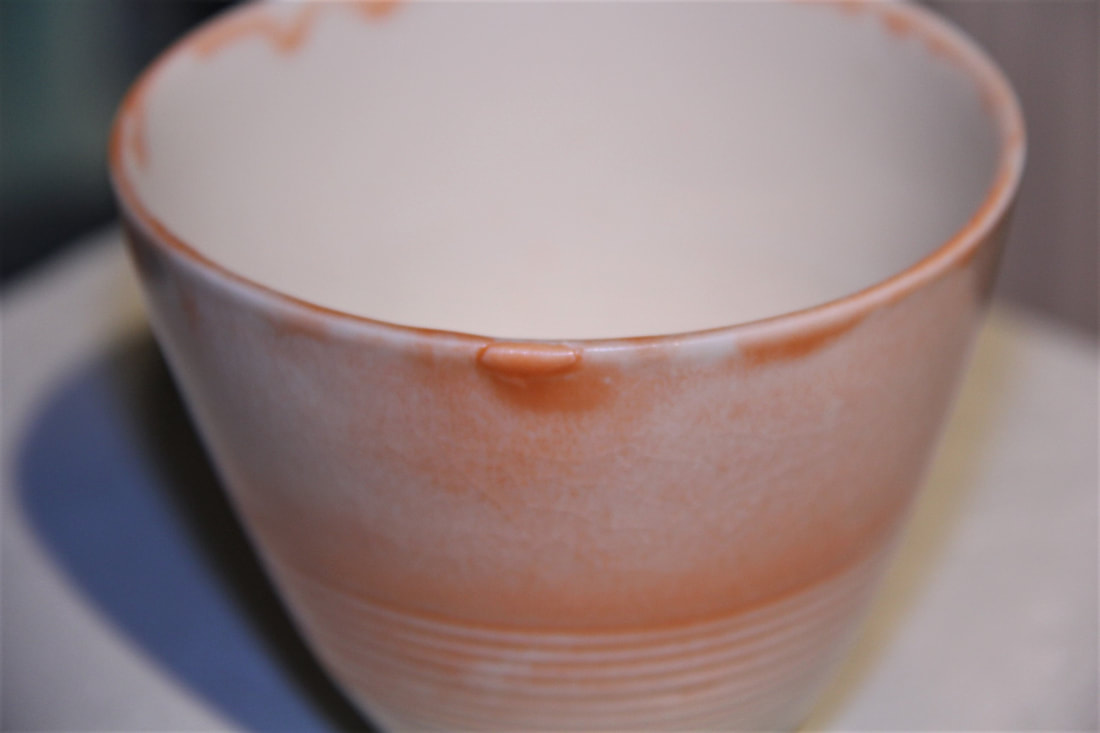
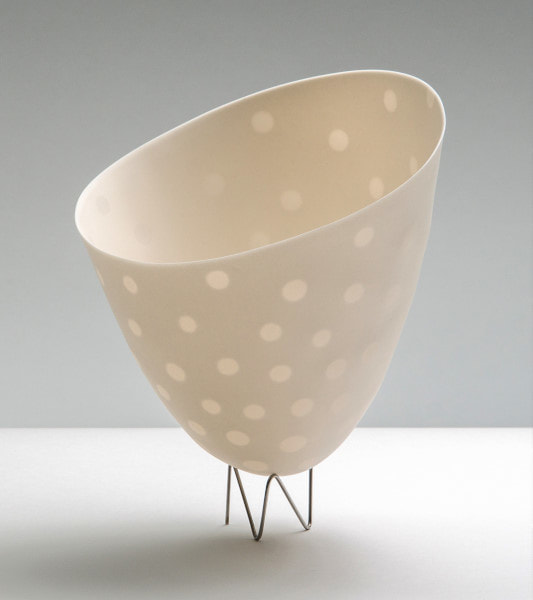
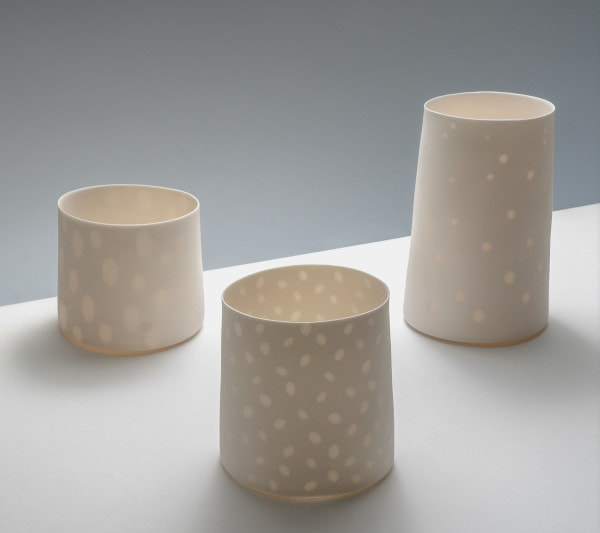
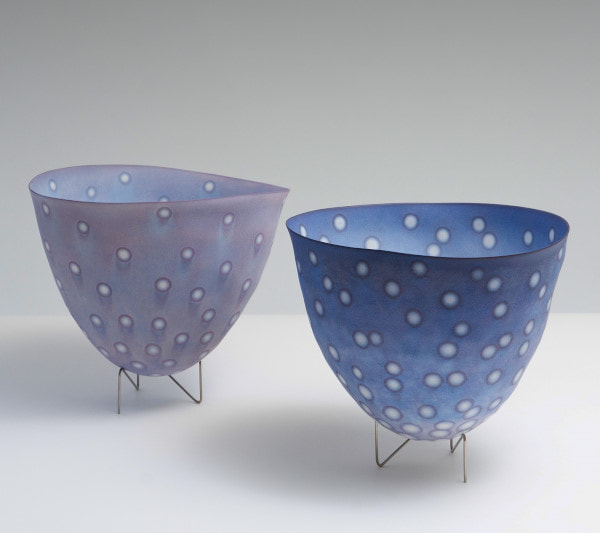
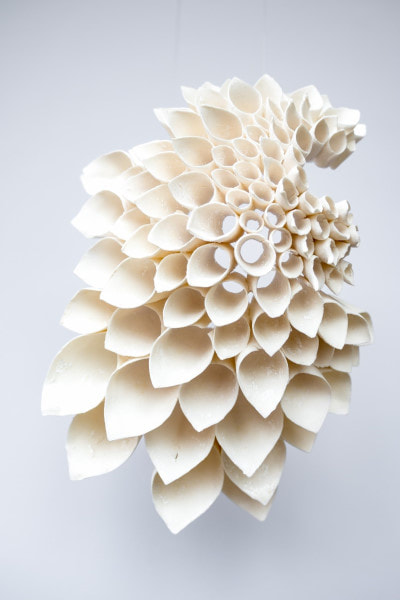
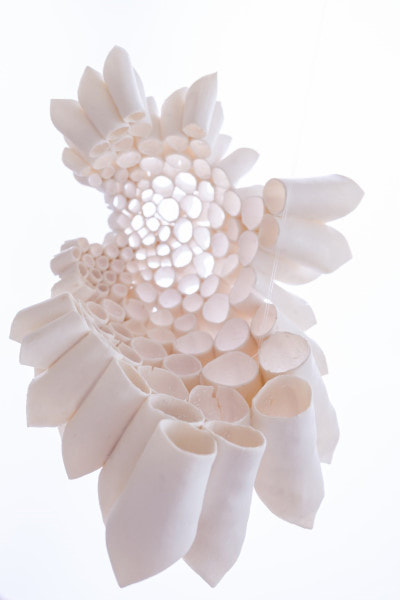
My educational background lies in engineering, science and research. At the free university of Brussels, I first obtained the degree of Bio-engineer in cell and gene biotechnology. That was followed by a PhD in applied biological sciences during which I focused on sourdough fermentation. Thereafter, I started a career in the pharmaceutical industry, mainly as project manager. During that time, I continued taking several classes that brought me closer to my inner selve and passions. It is no more than 10 years ago that I first experienced working with clay. The joy of creating, the feeling of clay on my hands and the peace of mind all this brought were truly overwhelming. About 5 years ago I decided to enroll in the ceramics program at the Genk academy of visual arts and media. Till today, the ceramics classes have continued to equipped me with skills and knowledge relating to the materials and processes of the discipline. Very soon it became clear that porcelain would become the ideal medium for my work.
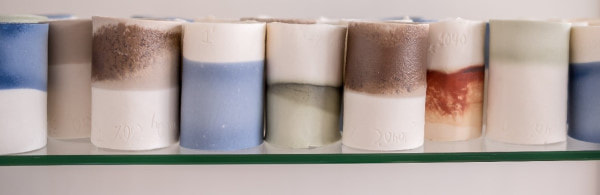
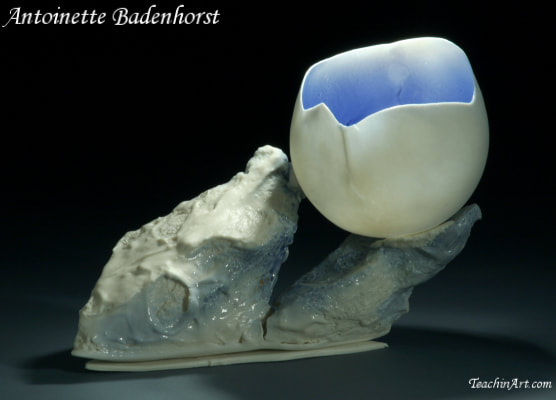
Once a researcher, always a researcher, so I dedicate a lot of time to sample making and the testing of new techniques. For the making of my works, I rely on a mix of techniques: handbuilding, slip casting, dipping and the use of paper molds or other “carriers” to make individual elements which then are assembled into a – partly- intuitive final pattern.
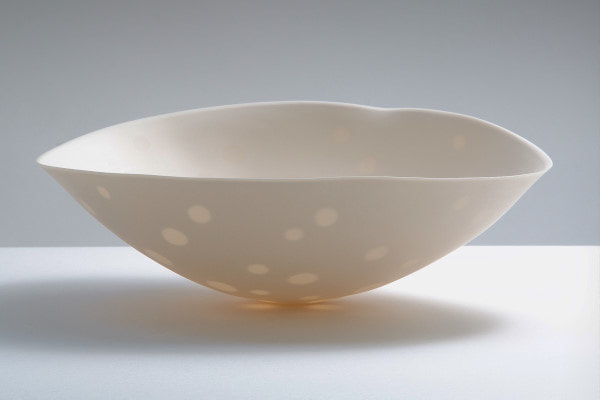
I rarely add color or glazes to my work because I love the whiteness, pureness and translucency of porcelain. I believe that in some cases the combination of shape and a delicate play of texture, results in enough complexity. In case I do decide to add color, I always keep a certain degree of sobriety in mind not mixing too many color palettes or by using coloring agents that enable me to obtain a subtle natural look and feel. Mostly I rely on the use of either pigments or oxides for the coloring of porcelain clay bodies. When I want to add subtle color to bisque-fired pieces (or even green ware), I prefer the use of water-soluble metal salts. All works are fired at cone 6 under oxidizing conditions.  Square bowl, Porcelain, cone6 (1245°C), oxidation As a newcomer in the arena of ceramic artists, I want to thank Antoinette and Koos Badenhorst for providing me this platform and for sharing so much valuable information through their e-courses and TeachinArt portal. Links:
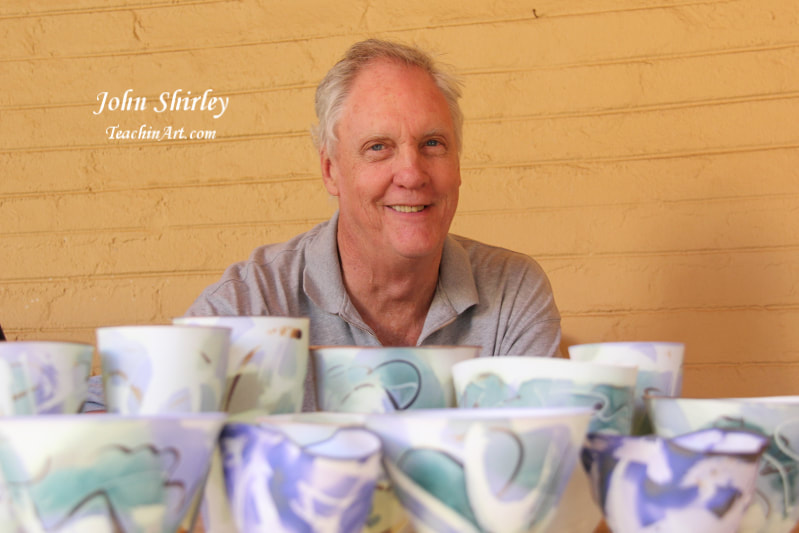
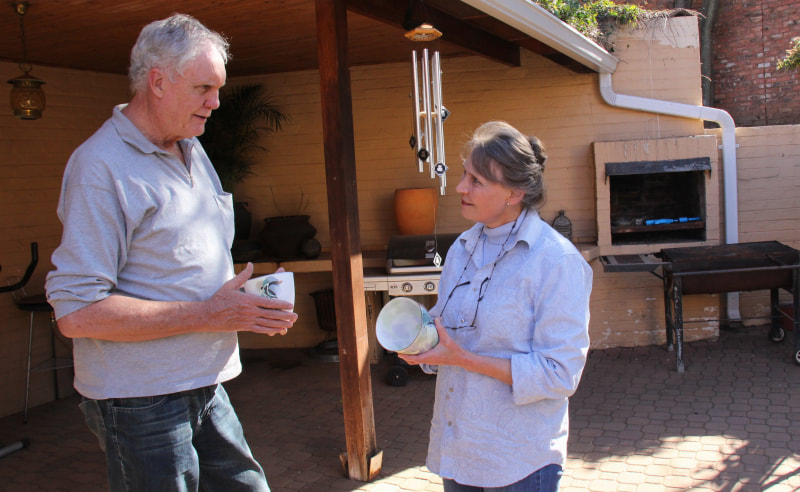
E-courses (online courses) at TeachinArt Preview e-courses Demonstrations, tips and techniques Our art instructors Colored clay e-course with Curt Benzle John Shirley is a ceramic artist from South Africa, who was selected as a member of the International Academy of Ceramics in 2010. Here is John in his own words.
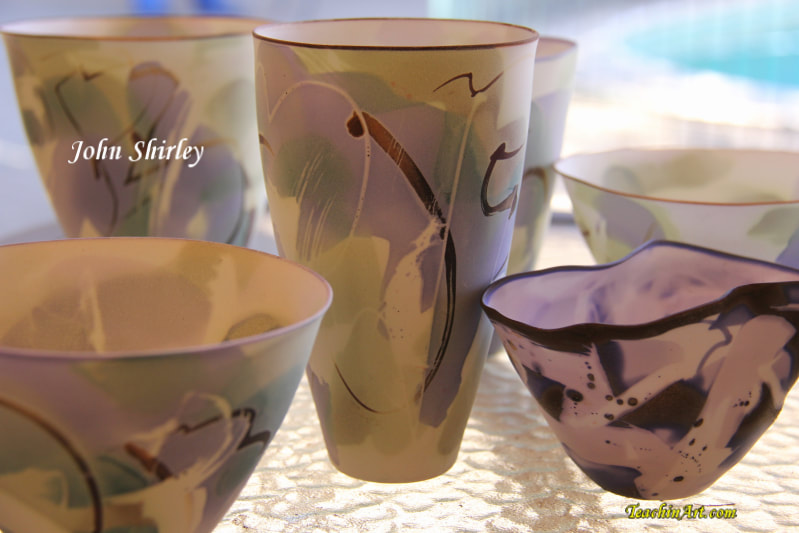
The body has a high shrinkage and a tendency to warp in the firing and although I have tried several ways to stabilize the body in the firing with various setters, I now accept the gentle warping produced by the firing as a part of the process. Choosing to work with bone china for my work is I feel something that has worked really well for me and the work I produce with this body is quite different to any work I would have produced using the porcelain body I was using before. Links:
Tags:
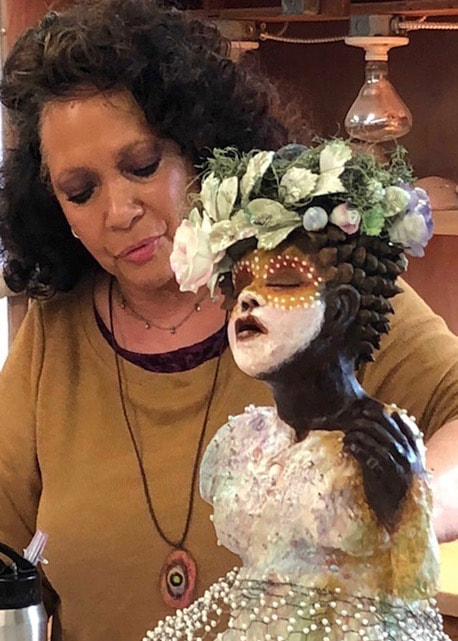
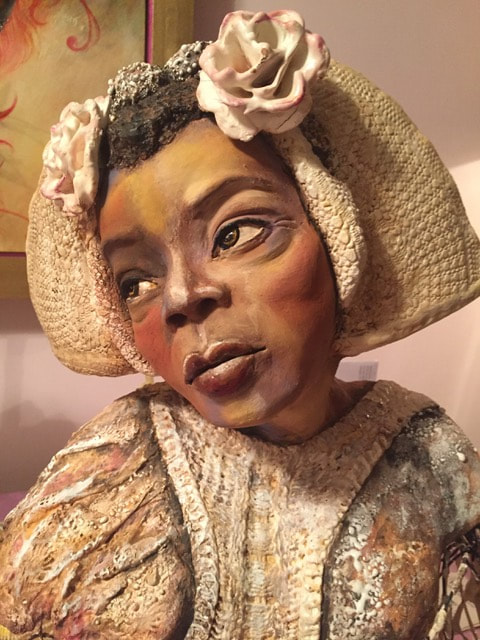
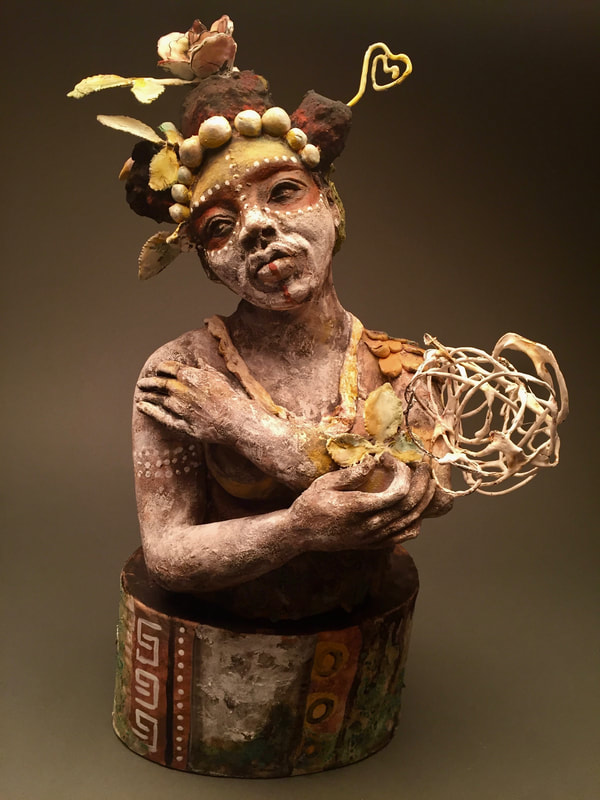
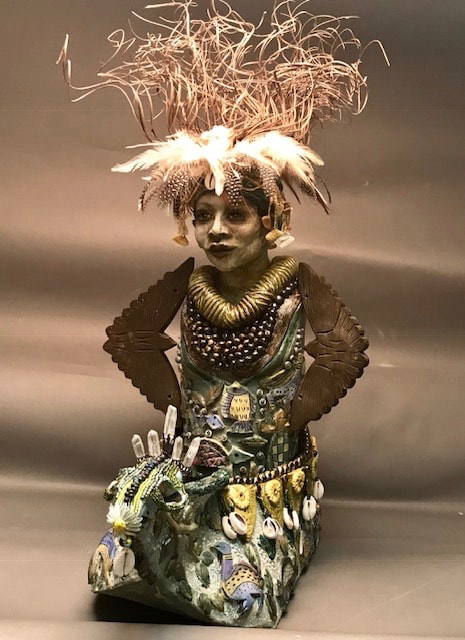
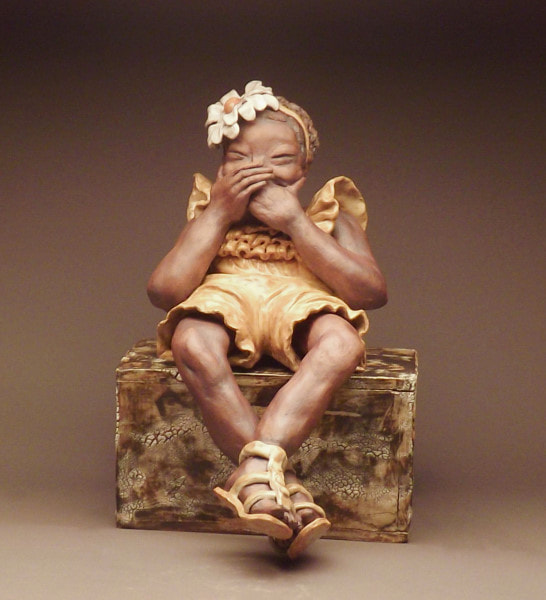
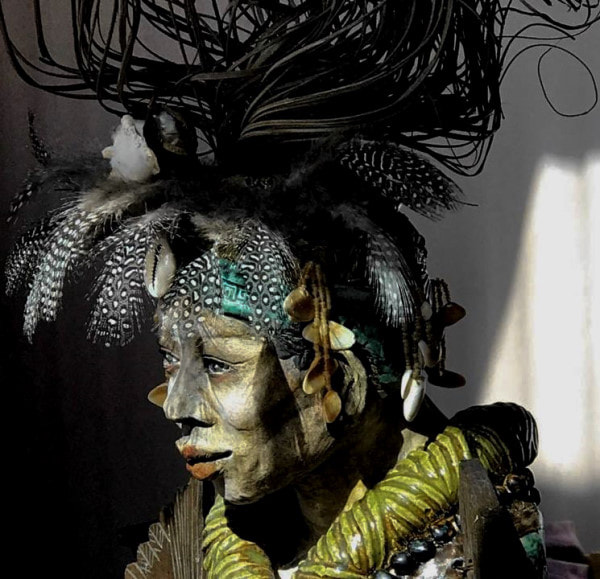
#SouthAfricanartist #bonechina #JohnShirley #translucentporcelain #IAC Kathlyn J Avila-Reys is a ceramic artist who paint emotions and special effects on her clay sculptures. She completed the Post-fired Finishes class of Marie EVB Gibbons at TeachinArt. Here is Kathlyn in her own words.
I have exhibited my work at numerous galleries, universities, and institutions. I have received a number of awards and certificates, as well as being selected to have a solo show entitled, “No Ordinary Woman”. The theme of this show grew out of my childhood interest in the women in my community, especially those considered to have “special powers”- whether real or imagined. Although I’m inspired by people I have encountered, my figures embody “familiar souls” that viewers can recognize regardless of where or when they grew up. Each of my figures is an expression of a unique individual, whose story is told through adornment, symbolism, and gesture. Color, pattern, and texture intrigues me which promotes an open playground for ceramics and the ability to explore many of its possibilities. I have always been a doll maker, but the transition of making cloth dolls to ceramic figures has given me a broader enjoyment and satisfaction in the process of their creation. I love the idea of working with a medium that challenges me to transform a ball of clay into forms and figures that become characters based on my life and imagination. Working in clay has become my mental retreat, my vacation away from the world, my hands are happiest when in the process of construction. My intricate style echoes the influences of African, Native American and Latin American cultures. I uniquely design my work with an ensemble of metaphysical symbolism and color, which then captures an aura of mysticism, magic, and spirituality.
Links: E-courses (online workshops) at TeachinArt Preview E-courses Our Art Instructors China painting with Paul Lewing Demonstrations, tips & techniques Tags:
#paintingonclay #claysculptures #clayartist #Virginiapotter #handmade #clayshares #teachinart
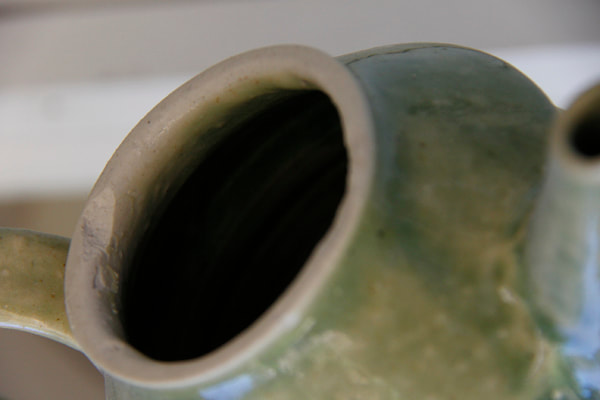
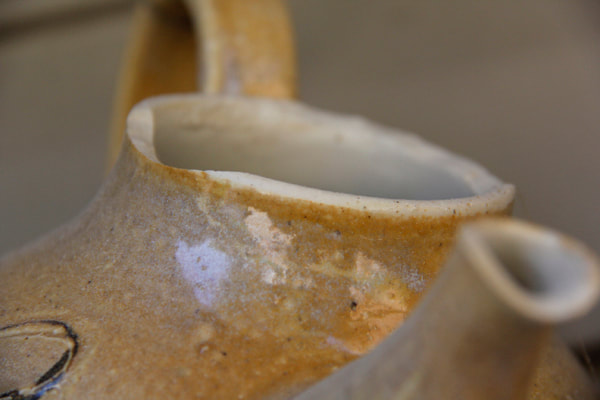
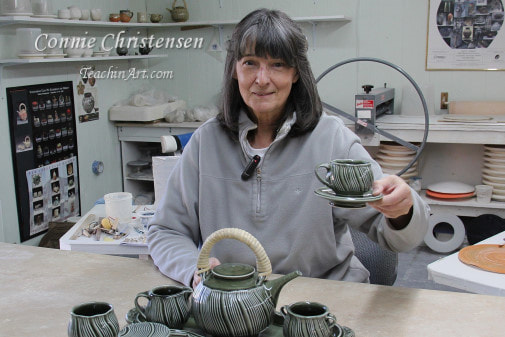
If you are a potter, how many times have you found a lid stuck to a teapot or lidded box due to the glazing? How many times have you wiped off glaze that you should not have wiped off? How many times did you loose a lovely teapot because you had to break the lid loose from the teapot?
These pictures below are examples of the glazing challenges that potters experience when making anything with a lid on.
In the online class, Connie discuss glazing challenges and shows easy techniques for preparing pots for successful glazing.
Links:
Faceted teapot set e-course with Connie Christensen Shino glazing e-course with Connie Christensen Glazing made easy e-course with Antoinette Badenhorst (guest artist Lynn Barnwell) E-courses (online classes) at TeachinArt Demonstrations, tips and techniques Our art instructors
Tags:
#facetedteapots #porcelainteapots #makingteapots #teachingartist #Coloradopotter #teachinart #ceramicschool #teapotset #clayteapot
Tags:
#sculptingclay #translucentporcelain #ceramicschool #porcelainsculptures #claysculptures #potterytips #teachinart
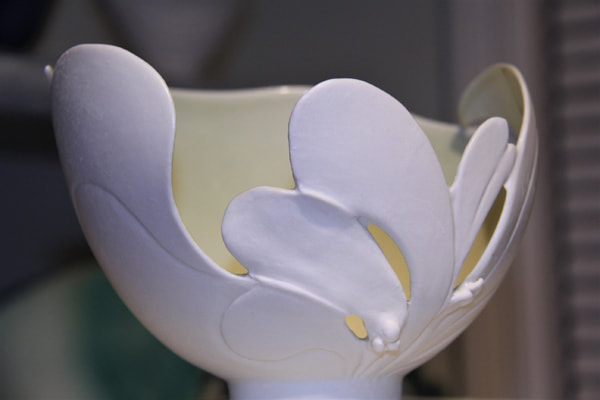
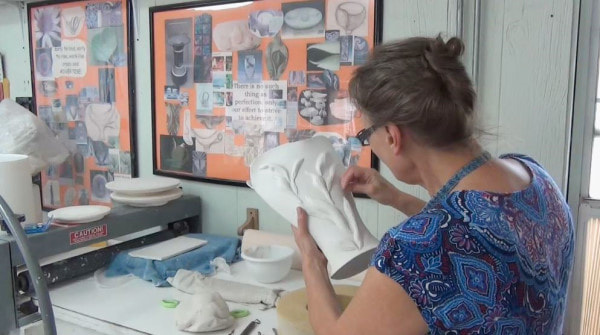
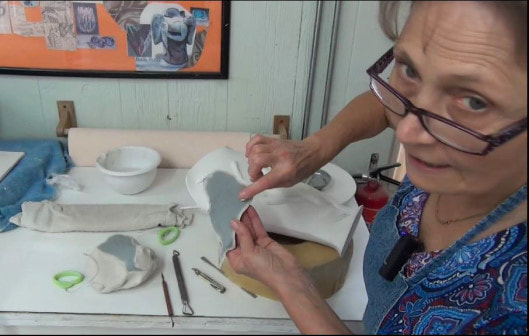
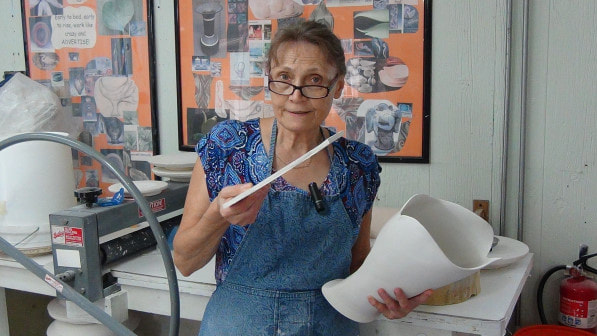
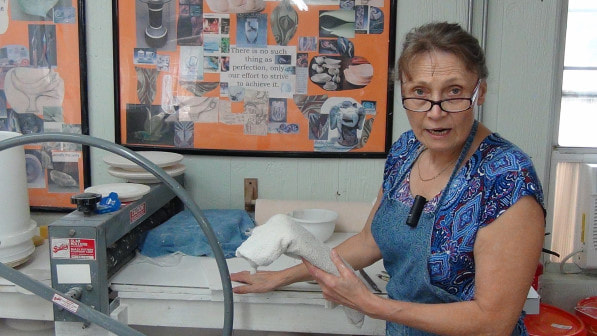
Paper clay is many times used by ceramic artists to make the construction of sculptures easier. Antoinette Badenhorst demonstrates how she uses paper clay to create translucent porcelain vessels. Paper clay burns out in the pottery kiln and does not really affects the final outcome of the sculpture. It helps with the forming and sculpturing.
Links:
Understanding porcelain e-course with Antoinette Badenhorst Porcelain handbuilding e-course with Antoinette Badenhorst E-courses (online workshops) at TeachinArt Demonstrations, tips and techniques (Tips shared by teachers of TeachinArt) Preview e-courses (take a quick peek into our online workshops) Art Instructors (Meet our online art instructors)
Tags:
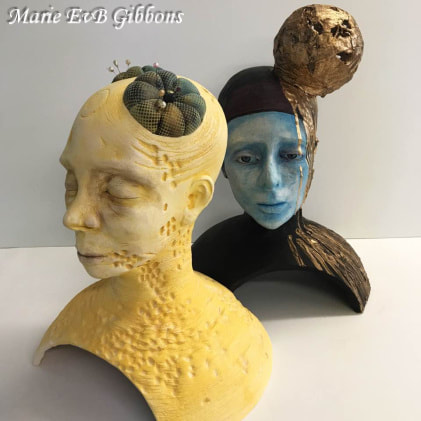
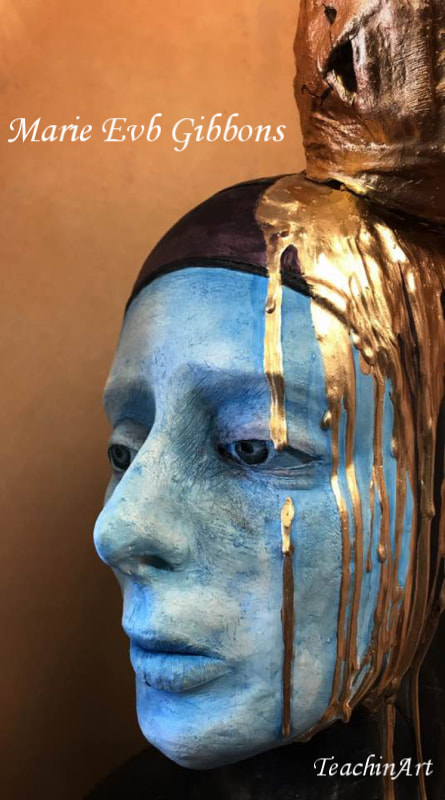
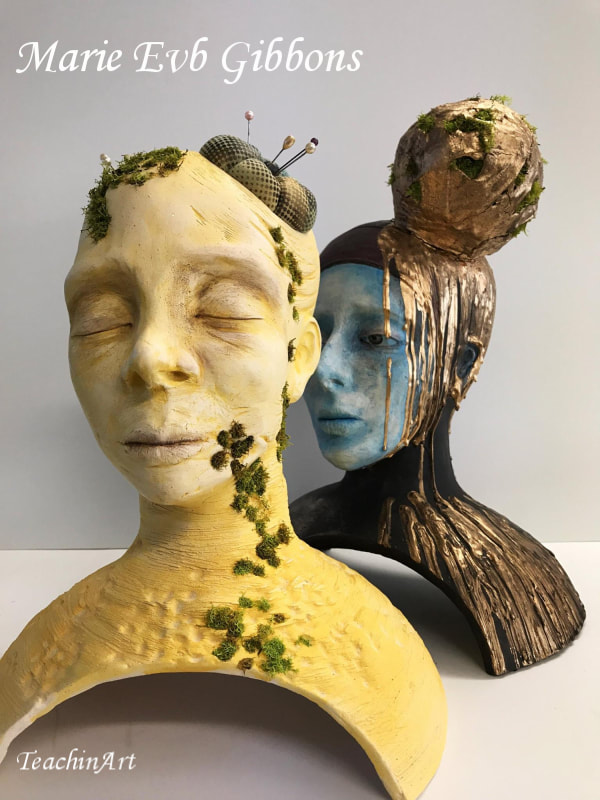
#paperclay #paperporcelain #translucentporcelain #recycleclay Dementia is a brain disease that causes a long-term and often gradual memory loss and decrease in the ability to think. It affects a person's daily functioning and family members have to learn to cope with something that they do not understand. Marie EVB Gibbons is one of the online instructors at TeachinArt who teaches the online workshop, post-fired finishes. She shows in her online class how to paint with acrylics on clay. She makes her own clay sculptures and each of these is used to tell a life story. Her dad went through the struggles of dementia, and as an artist, she tried to understand what it means to loose your memory and mind. Here is Marie in her own words. She uses her clay sculptures and acrylic paints to express the emotions and sadness of dealing with dementia (loss of memory).
I watched this video again - of me speaking about what I was trying to figure out about dementia, and I look at that now and think, wow, those were the good old days. That is when my Dad could acknowledge his malfunctioning memory, but still manage to move forward, and live his life. Now, my Dad is living in a memory care facility. He is in a constant state of not knowing, not understanding, not remembering. Now, he tries so hard to gain an understanding of why. Why is he there. What has happened to him. What is being done to help him. The saddest part - in my opinion, is that you can't explain to a person with dementia that they have dementia. I think even cancer is a kinder evil. At least someone with cancer can understand there is an evil in their body, an illness. A person with dementia cannot understand that their brain is dying, it is not working with them anymore, in fact it is working against them. The very thing (the brain) that helps one comprehend, is not an aid in problem solving and analysis, but a tool of distraction. It's like accidentally leaning on the delete button of your keyboard, and all of a sudden being witness to things just erasing, to become unaccessible. When he doesn't know who I am, he questions if I am someone important to him. I choose to believe that this is proof of the heart's memory. That somehow, in his being, he knows me, but it is not in the traditional way of knowing. When I confirm that I am someone important, that I am his daughter, it brings him to tears, and to feelings of stupidity, and sadness. How can a father forget his child, his wife, his life. I try to comfort him with explanations that might make sense, to both he and I. I like the analogy of an air bubble. I tell him, "I am in an air bubble right now. You can't see the information that goes with me, but the bubble will pop eventually (and hopefully, for a little longer) and then you'll put it all together again, as it is visible, even if just for a moment.
That is dementia to me at this moment. Something that has stolen my father's mind, life, memories, being. We have this physical body in front of us that tempts us into a belief that maybe, just maybe things could be OK again. But, that is far from the truth. I find myself mourning a soul, being stuck with a body. It's such a conflict. Links: Post-fired finishes e-course with Marie Gibbons E-courses (online workshops) at TeachinArt online school of art Preview e-courses at TeachinArt Demonstrations, tips and techniques Tags:
#paintingonclay #postfiredfinishes #mariegibbons #teachinart #dementia #memoryloss #arteducation #teachingart #claysculpture #acrylicpainting |
AuthorTeachinArt is an online art school with professional artists as instructors who educate, enridge and promote art. Categories
All
|


 RSS Feed