TeachinArt.com
  • Home
  • Online workshops
    • Understanding Porcelain
    • Handbuilding classes >
      • Porcelain handbuilding
      • Colored clay
      • Handbuilding Pottery For Beginners
    • Wheel thrown classes >
      • Porcelain Tips for Wheel Pottery
      • Take throwing to the next level
    • Teapot classes >
      • Pinching Teapots for Beginners
      • Faceted Teapot set
      • Wheel thrown teapots
    • Dinnerware classes >
      • Wheel thrown porcelain dinnerware
      • Handbuilding porcelain dinnerware
    • Glazing & Firing >
      • Shino glazing
      • Glazing made easy
      • Alternative firing
      • Glazing with Ron Roy
    • Painting on clay >
      • China painting
      • Post-fired finishes
    • All Artists Making A Living (AAMAL) >
      • Success stories
    • Woodworking classes >
      • Introduction to segmenting
    • Preview E-courses
  • Instructors
    • Antoinette Badenhorst
    • David Voorhees
    • Marcia Selsor
    • Connie Christensen
    • Nan Rothwell
    • Lynn Barnwell
    • Marie EvB Gibbons
    • Paul Lewing
    • Curtis Benzle
    • Robert Rundquist
    • Ron Roy
  • Registered students
  • Contact us
    • About us
  • Tips / demos
  • Students work
  • Blog

Wood firing kilns and processes

9/30/2019

1 Comment

 
Picture
David in his wood fire kiln
​Many potters dream about having their own wood fired kiln, but what exactly goes on behind the scenes. We asked David Voorhees, one of our online teachers who has his own wood fire kiln in North Carolina to answer some of the most common questions about wood firing.  
  • ​How long does it take to fire the kiln?
  • How long does it take to pack and unpack the kiln?
  • How much wood do you use?
  • ​How long do you normally fire the kiln?
​​Every wood-fired kiln is different as they are all site built and of varying dimensions. Firing lengths can vary for effect as well with many potters reaching cone 10 or 2300F then holding it there for a day or more to accumulate melting wood ash. My kiln is pretty straight forward with a rise to cone 10, then spraying a few pounds of soda ash solution followed by slowly shutting it down as the last of the firebox wood gets consumed. My kiln holds about 250 pots and takes 26-28 hours to fire and 3 days to cool down. I usually have 3 to 6 potters join me with a few pots and some firing duties. Since it also a car kiln it is easy to load taking only two to three hours to load and get started. Unloading takes less than an hour. I try to fire 4 times a year using about 1 1/2 cords of sawmill scrap wood for each firing. Wood preparation is a big job requiring helpers. Plentiful seasoned and dry wood is a must. Wood firing is an amazing community building effort and quite different from much studio pottery work time alone in a studio. To help with that aspect I have incorporated a pizza oven into the kiln design. When the firing is done, we make and eat pizzas! Hard work but very rewarding.
Picture
Before the firing
Picture
After the firing
​​The trolley just after pulling it out. Note the twist bottle leaning with the brown topped jar; these two fused together during the firing. The jar was on the trolley near the center post with drip, the twist bottle was on the bag wall and they got too close, fusing up. To extricate them without losing other pots I had to reach in through a 6" gap, using my iPhone to "see" what was going on. I then removed smaller pots through the gap and made room to move larger pots off of the top kiln shelf so I could lift up the fused pair onto the shelf where they now sit. Fortunately, the only pot lost was the twist bottle which gave up a chunk when pulled from the jar. ​A small price for an important lesson with car kilns: leave lots of clearance!

​David presents a 6 weeks online workshop at TeachinArt (porcelain tips for wheel pottery).
​​
He shows potters how to push the limits of porcelain and demonstrates the easy way to get the best out of wheel throwing. 

Interesting books about wood firing.
  • The art of firing by Nils Lou
  • Wood-fired stoneware and porcelain  by Jack Troy
  • The kiln book by Frederick L. Olsen (here you find diagrams and instruction on how to build different anagama kilns)
Picture
David in the TeachinArt studio during the recording of his online workshop

Links:
E-courses at TeachinArt
Our Art Instructors
Preview e-courses
Demonstrations and tips
Tags:
#woodfiring #naturalfiring #teachingpottery #learnpottery #nortcarolinapotters 
1 Comment

Raku and mixed media with Claire Beck from Australia

8/6/2019

2 Comments

 
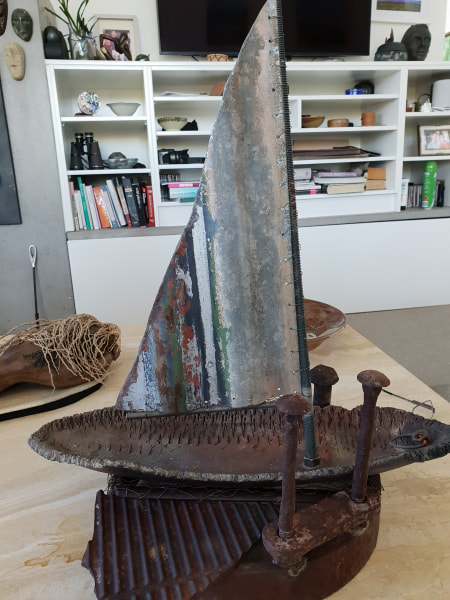
Claire Beck lives and work in the beautiful Gold Coast Hinterland region of Queensland in Australia, about 10 kilometers from the coast as the crow flies. She completed two of the online workshops at TeachinArt, Alternative firing with Marcia Selsor in September 2016, and Porcelain Handbuilding with Antoinette Badenhorst in July 2015
Picture
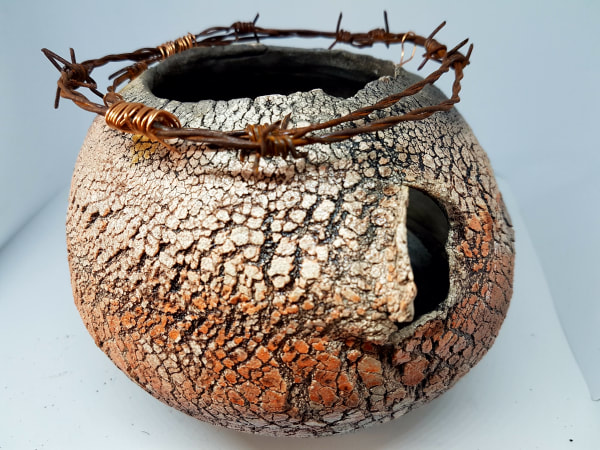
Rabbit Proof Fence - raku with sodium silicate and barbed wire. 2017

​​I have been doing ceramics for about 8 years – both sculpture and wheel/hand built pots under the initial tutelage of the wonderful Midge Johannsen at the Sculptors’ Society Gold Coast but now I teach from my own home studio and am Treasurer of the Society. I developed an early interest in raku after having done a workshop with the Gold Coast Potters Association of which I am also a member. Since then I have built and owned 3 raku kilns and do at least two or three firings each month. I did the Alternative Firing online course of Marcia Selsor and found it very useful since I also intend doing regular wood firings later this year.
Picture
Black Betty raku kiln
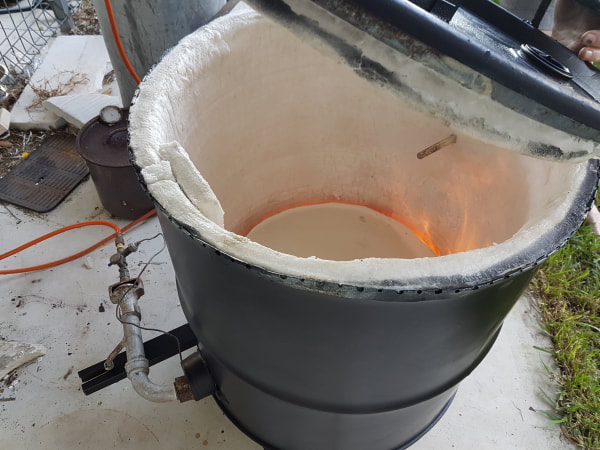
​My current raku kiln is called Black Betty for obvious reasons. I usually fire to around 1,050 C. The first firing into which I put the more fragile pieces usually takes around 40 mins but from the second firing onwards the time reduces until its down to around 20 mins. I reduce for about 20 mins then spray a fine water mist over the pieces to cool them. To maintain lustre I spray pieces with automotive clear satin finish. I’ve had pieces outside for a couple of years which still show lustre using this spray. I have a small electric kiln in which I fire greenware.
​I have entered a number of ceramic competitions and exhibitions and have taken part in several two and three people shows locally. Last year I won the Tony Palmer Sculpture Award for my piece Hark the Herald Angels.

I like to mix and combine materials. I started weaving natural fibres onto raku. From there I moved to combining natural timber with raku and now I use found metal objects with raku. I find raku goes with everything! I am very fortunate in that I have a wonderful partner who is happy to weld or wood turn as required.
Picture
Hark the Herald Angels Sing (naked raku and wire). Winner of the Tony Palmer Award at the Sculptors’ Society Gold Coast in 2018)
Picture
Our Lady of Perpetual Bliss - raku and found objects
Picture
Alongside - raku with found metal objects
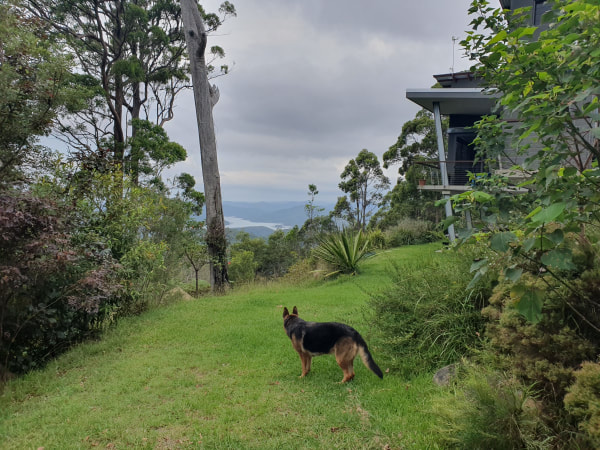
​When we bought out block of land (about 2 acres) in 2008 we loved it so much that we used to say “when we live here we’ll truly be living in bliss” and after a while when we started building our friends would ask “how’s Bliss coming along” and so our house, Bliss, was named.
Picture
Can you see why we call it Bliss?
Picture
Inside Bliss - I'm running out of room!!
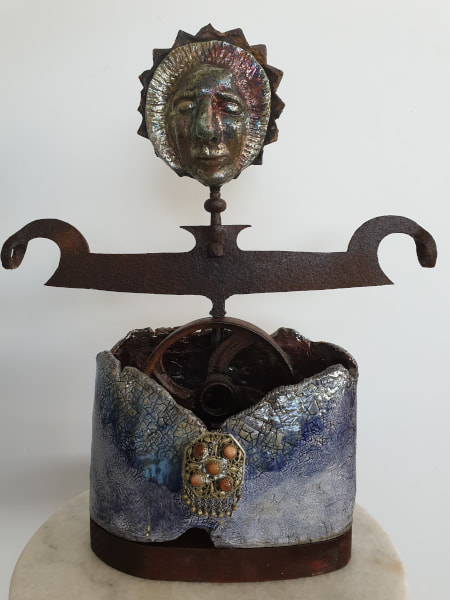
My artistic endeavours really only started when I retired in 2010 with life drawing classes. From there I moved to printing where I won the Caldera Award in Murwillumbah NSW (New South Wales) for my piece Rainforest Cathedral.
Picture
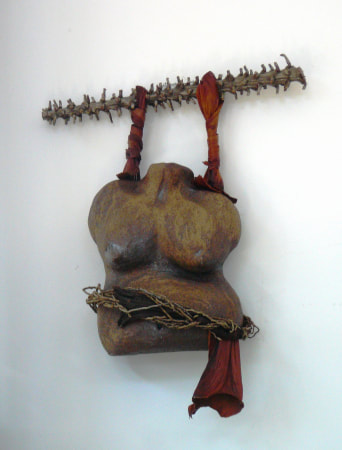
Trophy Wife - ceramic with natural fibres

​​I teach a popular monthly class for the CWA (the Country Women’s Association) and after Easter I will start a regular weekly raku group at the Society’s teaching studio nearby.

I have held a couple of raku workshops up here at Bliss for the Society which have been popular. Everyone seems to love raku!

I guess the thing I love most about it is the immediacy of the art along with the (often) unexpected results you can get. I am not noted for my patience LOL.
Picture
The happy CWA Raku@Bliss group hard at it in the studio
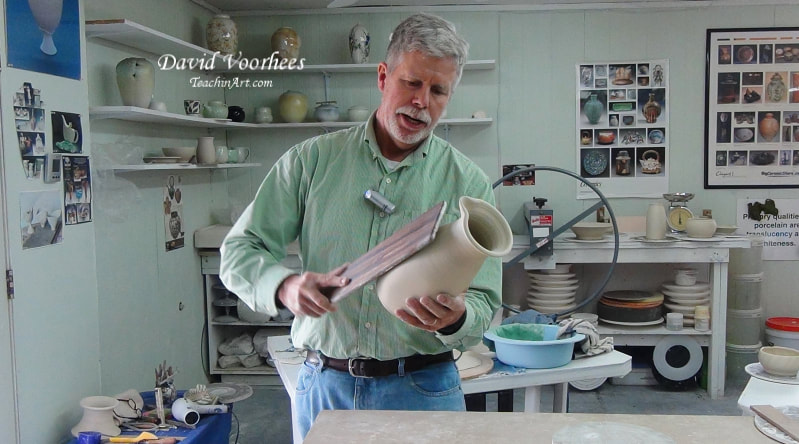
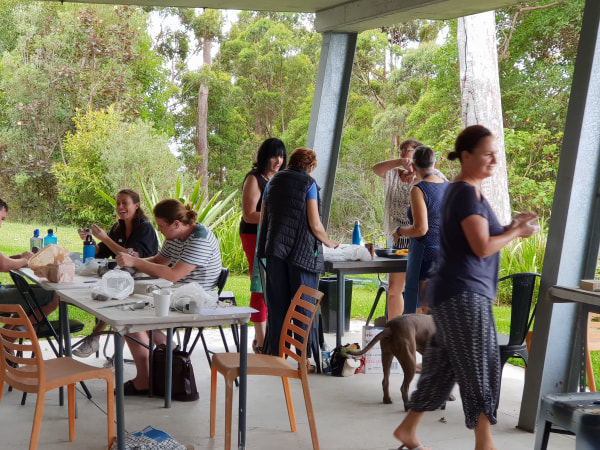
​I think my future probably lies in teaching. Funnily enough I used to teach computing as I came to the world of raku via decades working in the IT industry at various teaching colleges and Universities both as a teacher and as an IT Manager. Before that I worked in advertising and publishing and ran a gallery in a small tourist town in North Queensland.  
Strange what paths our lives lead us on.

Links:
E-courses (online workshops) at TeachinArt online school of art
Demonstrations, tips and techniques (Tips shared by teachers of TeachinArt)
Preview e-courses (take a quick peek into our online workshops)
Art Instructors (Meet our online art instructors)
Alternative firing online course with Marcia Selsor (how to do obvara, raku, saggar firing)
Porcelain handbuilding online class with Antoinette Badenhorst (Learn how to get translucent porcelain hand made items)
Tags:
#mixedmedia #teachinartstudent #teachinart #rakufiring #raku #Australianpotter #alternativefiring
2 Comments

    Author

    TeachinArt is an online art school with professional artists as instructors who educate, enridge and promote art.

    Archives

    March 2022
    December 2021
    March 2020
    February 2020
    January 2020
    December 2019
    November 2019
    October 2019
    September 2019
    August 2019

    Categories

    All
    Alternative Firing
    Artists
    Bone China
    Carving Clay
    Centering Clay
    Clay Sculpting
    Colored Clay
    Decorating
    Demonstrations
    Glazing
    Handbuilding
    Mixed Media
    Painting On Clay
    Paper Clay
    Pinching Clay
    Porcelain
    Pottery Glazing
    Pottery Tips
    Raku
    Slip Casting
    Soluble Salts
    South African Artist
    TeachinArt Students
    Teapots
    Trimming
    Weaving
    Wedging
    Wheel Throwing
    Woodworking Tips

    RSS Feed

Links to other pages

Home
Online workshops
Our Instructors
Registered Students
About Us
Contact Us
Tips & Demos
Behind the scenes
Student's work
FAQ
Reviews

Workshops by categories

Wheel thrown classes
Handbuilding classes
Teapot classes
Porcelain dinnerware classes
Glazing & decorating classes
Woodworking
©2020 TeachinArt
All rights reserved

Webmaster: Koos Badenhorst

  • Home
  • Online workshops
    • Understanding Porcelain
    • Handbuilding classes >
      • Porcelain handbuilding
      • Colored clay
      • Handbuilding Pottery For Beginners
    • Wheel thrown classes >
      • Porcelain Tips for Wheel Pottery
      • Take throwing to the next level
    • Teapot classes >
      • Pinching Teapots for Beginners
      • Faceted Teapot set
      • Wheel thrown teapots
    • Dinnerware classes >
      • Wheel thrown porcelain dinnerware
      • Handbuilding porcelain dinnerware
    • Glazing & Firing >
      • Shino glazing
      • Glazing made easy
      • Alternative firing
      • Glazing with Ron Roy
    • Painting on clay >
      • China painting
      • Post-fired finishes
    • All Artists Making A Living (AAMAL) >
      • Success stories
    • Woodworking classes >
      • Introduction to segmenting
    • Preview E-courses
  • Instructors
    • Antoinette Badenhorst
    • David Voorhees
    • Marcia Selsor
    • Connie Christensen
    • Nan Rothwell
    • Lynn Barnwell
    • Marie EvB Gibbons
    • Paul Lewing
    • Curtis Benzle
    • Robert Rundquist
    • Ron Roy
  • Registered students
  • Contact us
    • About us
  • Tips / demos
  • Students work
  • Blog