|
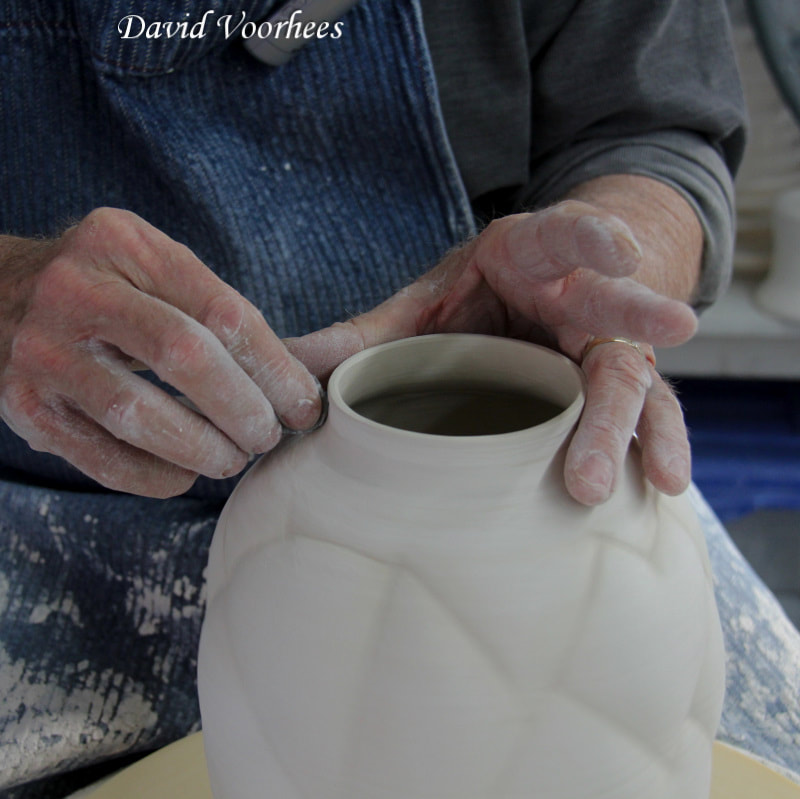
Centering of clay on the wheel is one of the most crucial parts of wheel throwing. This is the time to get the clay particles in the right place and to build on to the wedged clay process. If the clay is not centered correctly, then the pulling-up of the walls becomes a nightmare.
There are some potters who do not know that you can set the wheel to spin clockwise or anti-clockwise. Right handed potters should let the wheel spin anti-clockwise and left-handed throwers should switch the direction of the wheel head to a clockwise motion. Throwing on the wheel is easier if you use technique instead of force. It is easier to get your arm locked on your upper leg and let you leg do the pushing and steadying instead of just your arms. This is a video clip from the Understanding Porcelain e-course by Antoinette Badenhorst. TeachinArt brings ceramic workshops into the studio of potters around the world, and is the bridge between college students and hobby potters.
Other interesting links on our online school website:
Tags:
#centeringclay #wheelthrowing #potterytips #teachinart #wheelpottery #clayshares #ceramicschool #virtualclass
2 Comments
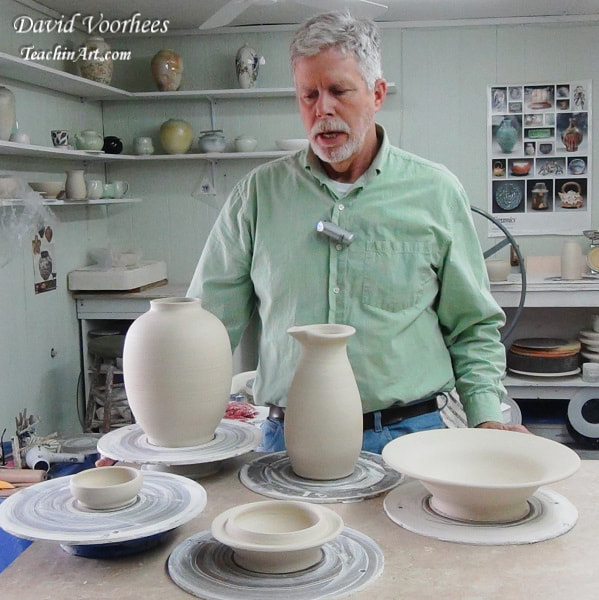
Wheel throwing tips from David VoorheesDavid Voorhees is a functional potter from North Carolina with over 40 years experience in ceramics. He is the instructor of the online workshop Porcelain Tips For Wheel Pottery at TeachinArt. Several potters have problems with opening and pulling up consistent cylinders or bowl forms. Some of the problems are uneven walls with too much thickness at the bottom, uneven rims, and slumping clay.
These are all common problems associated with skill development and learning to use porcelain on the wheel. Porcelain does require a bit more of us as craftsmen. It needs to be prepared better and we need to limit the amount of time it is allowed to be fully wet during forming. Here are my suggestions for those experiencing these common problems:
Links: Online workshops at TeachinArt Art instructors at TeachinArt Preview the e-courses presented at the art school Demonstrations & tips by our instructors and other artists and crafter's Tags:
#potterytips #wheelthrown #wheelthrownporcelain #wheelthrowingtips #ceramicschool #teachinart #wedgingclay #wedging
When is the right time to use blunt tools and when should you use sharp trimming tools? How dry should the pot be before you can start with the trimming? When is the best time in the drying stage to start with the trimming process? Is there a right and wrong way for trimming on the wheel? Which is the best trimming tool? How to trim a foot rim? How to trim porcelain?
All of these are valid questions by potters and these problems are all addressed in the online workshops at TeachinArt, the online art school where potters can see close-up demonstrations of each process and can learn the best techniques in the comfort of their own place and own time.
Links:
E-courses (online workshops) Demonstrations, tips & techniques Preview E-courses Our Art Instructors
Tags:
#trimmingclay #wheeltrimming #trimmingtools #trimmingclay #teachinart #trimmingtips #potterytools
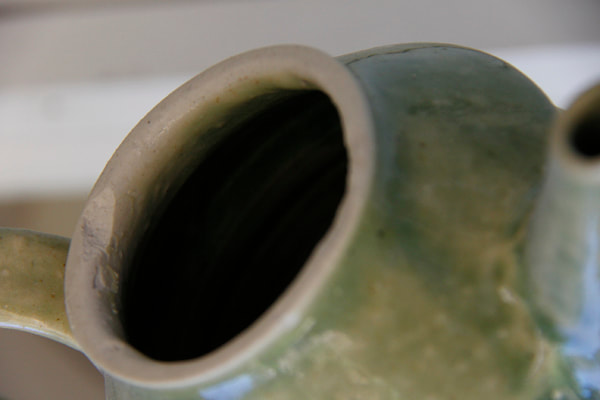
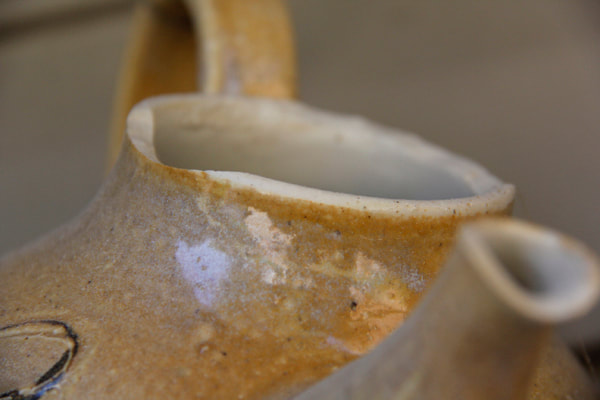
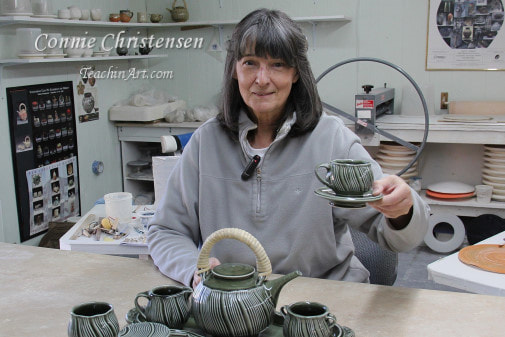
If you are a potter, how many times have you found a lid stuck to a teapot or lidded box due to the glazing? How many times have you wiped off glaze that you should not have wiped off? How many times did you loose a lovely teapot because you had to break the lid loose from the teapot?
These pictures below are examples of the glazing challenges that potters experience when making anything with a lid on.
In the online class, Connie discuss glazing challenges and shows easy techniques for preparing pots for successful glazing.
Links:
Faceted teapot set e-course with Connie Christensen Shino glazing e-course with Connie Christensen Glazing made easy e-course with Antoinette Badenhorst (guest artist Lynn Barnwell) E-courses (online classes) at TeachinArt Demonstrations, tips and techniques Our art instructors
Tags:
#facetedteapots #porcelainteapots #makingteapots #teachingartist #Coloradopotter #teachinart #ceramicschool #teapotset #clayteapot
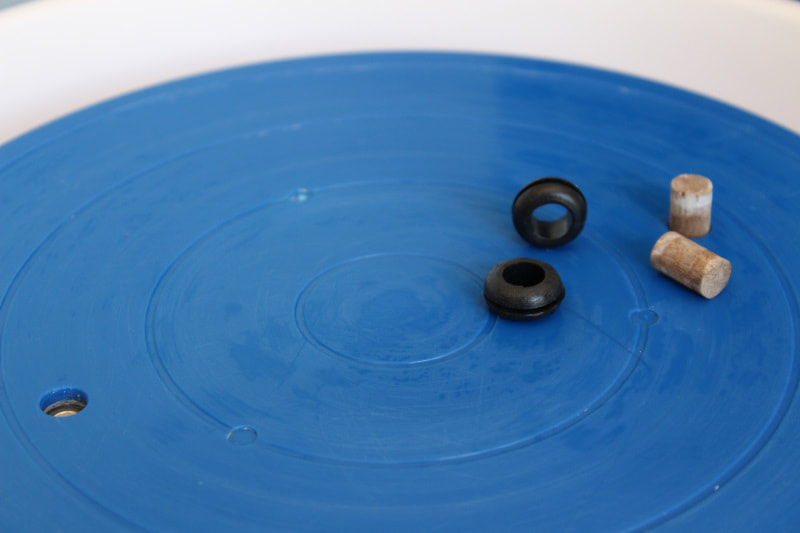
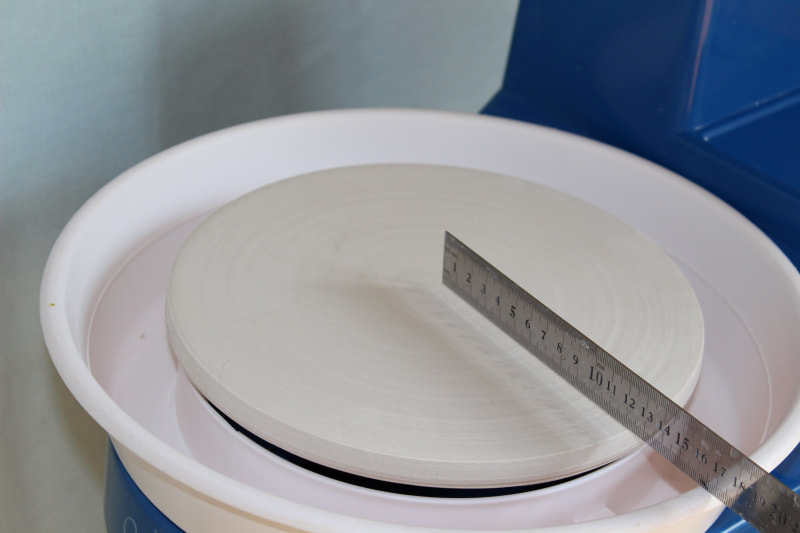
Antoinette Badenhorst and David Voorhees, both professional potters and teachers at TeachinArt show how to make plaster wheel bats for the pottery wheel. This demonstration was presented during the recording of David's e-course Porcelain Tips For Wheel Pottery at the studio of Antoinette in Saltillo Mississippi.
Mima Boskov from South Africa plaster bats
Mima Boskov is a South African potter who completed the Understanding Porcelain e-course of Antoinette Badenhorst at Teachinart.
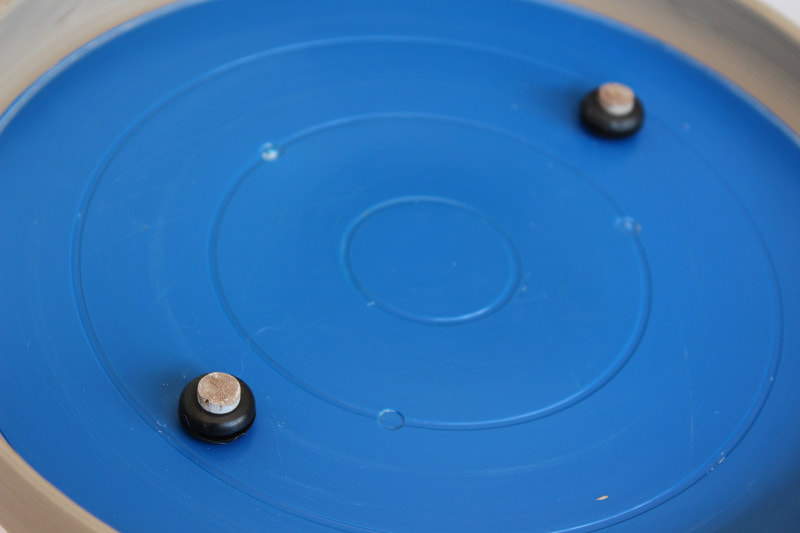
She learned in the online workshop how to make a plaster bat for her pottery wheel and then she decided to create her own version of the plaster bat. That is why TeachinArt is a platform for Artists who teach Artists. Mima is a typical example of one of the success stories of online teaching. Here is Mima's explanation in her own words. I took up pottery a few years ago, in an attempt to discover my Creative Self, liberate the Inner Child, find the Artist Within - ah, you've heard it all before: mid-life crisis and how to solve it... I've been wedging, throwing, despairing, buying books, Googling and reading articles with genuine passion ever since. I'm still waiting for the Artist, but I've revealed a determined Artisan Within, and sure have hatched an Inner Gyro Gearloose (for the younger among us, that's the whacky inventor from Donald Duck cartoons). The hatchling grew out of my frustration with relatively poor choice of pottery tools in South Africa: no Mudtools, no Griffin Grip, no Strongarm centering tool, no plaster bat mold systems... So many tempting goodies that one can glimpse on internet pages, but can't source locally. Ordering online involves shipping and import duties, and the price becomes extravagant. There is an Afrikaans saying in my country: "'n Boer maak 'n plan". It literally means "the farmer makes a plan", but is used when lateral thinking helps one find a novel and ingenious way of surmounting an obstacle. I realized that being the Boer with 'n plan and making my own pottery tools gives me almost as much pleasure and sense of achievement as making pots. We needed plaster bats for the Understanding Porcelain course. I had been trying to develop a plaster bat system for my wheel for a while, and a detail from Antoinette's drawing made everything click together.
Mima Boskov is a South African potter who completed the Understanding Porcelain e-course of Antoinette Badenhorst at Teachinart.
She learned in the online workshop how to make a plaster bat for her pottery wheel and then she decided to create her own version of the plaster bat. That is why TeachinArt is a platform for Artists who teach Artists. Mima is a typical example of one of the success stories of online teaching. Here is Mima's explanation in her own words. I took up pottery a few years ago, in an attempt to discover my Creative Self, liberate the Inner Child, find the Artist Within - ah, you've heard it all before: mid-life crisis and how to solve it... I've been wedging, throwing, despairing, buying books, Googling and reading articles with genuine passion ever since. I'm still waiting for the Artist, but I've revealed a determined Artisan Within, and sure have hatched an Inner Gyro Gearloose (for the younger among us, that's the whacky inventor from Donald Duck cartoons). The hatchling grew out of my frustration with relatively poor choice of pottery tools in South Africa: no Mudtools, no Griffin Grip, no Strongarm centering tool, no plaster bat mold systems... So many tempting goodies that one can glimpse on internet pages, but can't source locally. Ordering online involves shipping and import duties, and the price becomes extravagant. There is an Afrikaans saying in my country: 'n Boer maak 'n plan. It literally means "the farmer makes a plan", but is used when lateral thinking helps one find a novel and ingenious way of surmounting an obstacle. I realized that being the Boer with 'n plan and making my own pottery tools gives me almost as much pleasure and sense of achievement as making pots. We needed plaster bats for the Understanding Porcelain course. I had been trying to develop a plaster bat system for my wheel for a while, and a detail from Antoinette's drawing made everything click together.
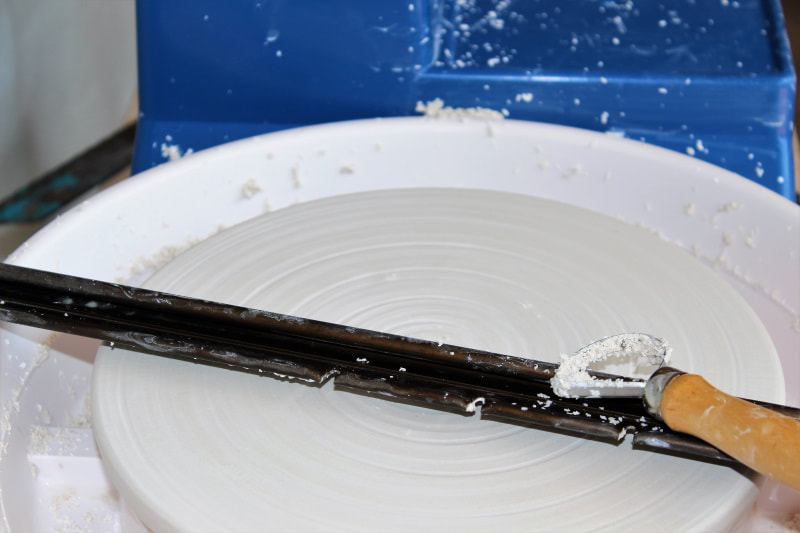
In another half hour, plaster can be taken off the plastic bat, using a thin spatula. After removing the dowels, the rubber grommets stay safely embedded in the underside of the bat, so the whole thing can be attached to the wheel head pins, and reused many times without damaging the plaster. A thin rubber mat on the wheel head helps secure the bat
Tags:
#potterywheel #wheelthrowing #wheelbats #teachinart #teachingpottery #ceramicschool #teachingpottery
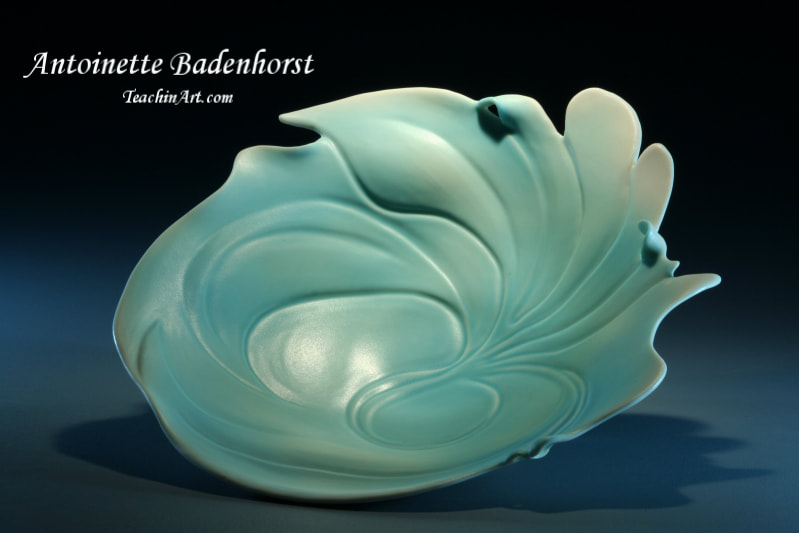
One of TeachinArt online teachers, Antoinette Badenhorst presented a hands-on workshop at the Pottery Studio in Bryanston South Africa where she demonstrated the carving and altering process of porcelain.
She calls porcelain the "Diva of clay" and tells her students that they have to understand the character of the clay to really push it to it's limits.
Links:
Understanding porcelain e-course with Antoinette Badenhorst Porcelain handbuilding online workshop with Antoinette Badenhorst E-courses (online classes) at TeachinArt Demonstrations, tips and techniques Preview e-courses
Tags:
#teachinart #wheelthrowing #teachingartist #carvingporcelain #alteringporcelain #porcelainplatter #divaofclay #ceramicschool #clayshares
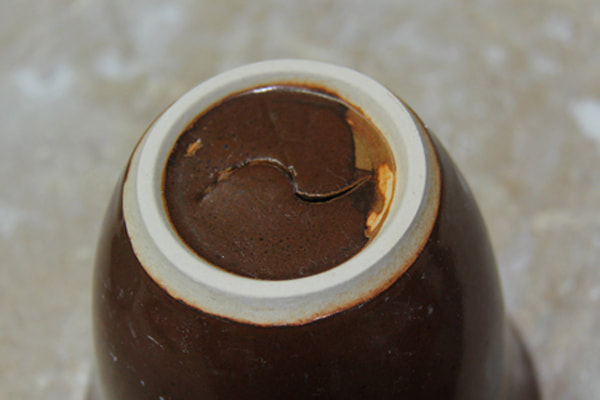
Potters can prevent most of the S-cracks in their work if they follow her advice and tips.
Links:
Understanding porcelain online class with Antoinette Badenhorst Porcelain handbuilding with Antoinette Badenhorst E-courses (online workshops) at TeachinArt Preview e-courses at the online art school Demonstrations, tips and techniques
Tags:
#potterycracks #fixingcracks# #teachingpottery #teachinart #clayfaults #faultsandremedies #porcelain #onlineschool #ceramicschool #clayshares |
AuthorTeachinArt is an online art school with professional artists as instructors who educate, enridge and promote art. Categories
All
|


 RSS Feed