TeachinArt.com
  • Home
  • Online workshops
    • AAMAL (All Artists Making A Living) >
      • Success stories
    • Alternative firing
    • China painting
    • Colored clay
    • Faceted Teapot set
    • Glazing made easy
    • Glazing with Ron Roy
    • Handbuilding porcelain dinnerware
    • Handbuilding Pottery For Beginners
    • Introduction to segmenting
    • Pinching Teapots for Beginners
    • Porcelain handbuilding
    • Porcelain Tips for Wheel Pottery
    • Post-fired finishes
    • Sculpted Clay Creatures
    • Shino glazing
    • Take throwing to the next level
    • Understanding Porcelain
    • Wheel thrown porcelain dinnerware
    • Wheel thrown teapots
  • Instructors
    • Antoinette Badenhorst
    • Bob Rundquist
    • Connie Christensen
    • Curtis Benzle
    • David Voorhees
    • Lynn Barnwell (Guest Artist)
    • Marcia Selsor
    • Marie EvB Gibbons
    • Nan Rothwell
    • Paul Lewing
    • Ron Roy
    • Sam Clark
  • Registered students
  • Contact us
    • About us
  • Tips / demos
  • Students work
  • Blog

Wood firing kilns and processes

9/30/2019

1 Comment

 
Picture
David in his wood fire kiln
​Many potters dream about having their own wood fired kiln, but what exactly goes on behind the scenes. We asked David Voorhees, one of our online teachers who has his own wood fire kiln in North Carolina to answer some of the most common questions about wood firing.  
  • ​How long does it take to fire the kiln?
  • How long does it take to pack and unpack the kiln?
  • How much wood do you use?
  • ​How long do you normally fire the kiln?
​​Every wood-fired kiln is different as they are all site built and of varying dimensions. Firing lengths can vary for effect as well with many potters reaching cone 10 or 2300F then holding it there for a day or more to accumulate melting wood ash. My kiln is pretty straight forward with a rise to cone 10, then spraying a few pounds of soda ash solution followed by slowly shutting it down as the last of the firebox wood gets consumed. My kiln holds about 250 pots and takes 26-28 hours to fire and 3 days to cool down. I usually have 3 to 6 potters join me with a few pots and some firing duties. Since it also a car kiln it is easy to load taking only two to three hours to load and get started. Unloading takes less than an hour. I try to fire 4 times a year using about 1 1/2 cords of sawmill scrap wood for each firing. Wood preparation is a big job requiring helpers. Plentiful seasoned and dry wood is a must. Wood firing is an amazing community building effort and quite different from much studio pottery work time alone in a studio. To help with that aspect I have incorporated a pizza oven into the kiln design. When the firing is done, we make and eat pizzas! Hard work but very rewarding.
Picture
Before the firing
Picture
After the firing
​​The trolley just after pulling it out. Note the twist bottle leaning with the brown topped jar; these two fused together during the firing. The jar was on the trolley near the center post with drip, the twist bottle was on the bag wall and they got too close, fusing up. To extricate them without losing other pots I had to reach in through a 6" gap, using my iPhone to "see" what was going on. I then removed smaller pots through the gap and made room to move larger pots off of the top kiln shelf so I could lift up the fused pair onto the shelf where they now sit. Fortunately, the only pot lost was the twist bottle which gave up a chunk when pulled from the jar. ​A small price for an important lesson with car kilns: leave lots of clearance!

​David presents a 6 weeks online workshop at TeachinArt (porcelain tips for wheel pottery).
​​
He shows potters how to push the limits of porcelain and demonstrates the easy way to get the best out of wheel throwing. 

Interesting books about wood firing.
  • The art of firing by Nils Lou
  • Wood-fired stoneware and porcelain  by Jack Troy
  • The kiln book by Frederick L. Olsen (here you find diagrams and instruction on how to build different anagama kilns)
Picture
David in the TeachinArt studio during the recording of his online workshop

Links:
E-courses at TeachinArt
Our Art Instructors
Preview e-courses
Demonstrations and tips
Tags:
#woodfiring #naturalfiring #teachingpottery #learnpottery #nortcarolinapotters 
1 Comment

How to make your own plaster bat for the pottery wheel

9/30/2019

2 Comments

 
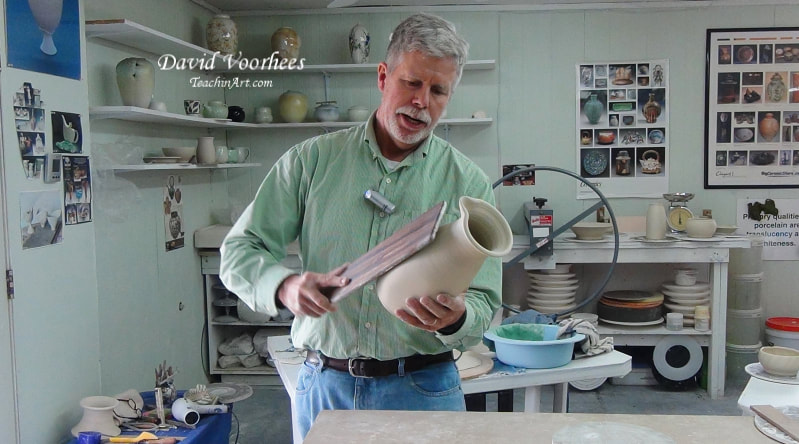
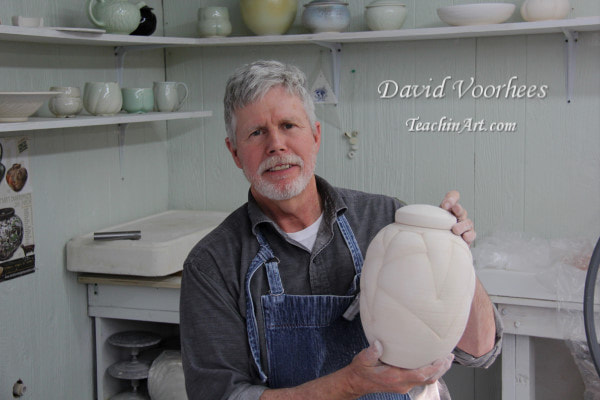
Antoinette Badenhorst and David Voorhees, both professional potters and teachers at TeachinArt show how to make plaster wheel bats for the pottery wheel. This demonstration was presented during the recording of David's e-course Porcelain Tips For Wheel Pottery at the studio of Antoinette in Saltillo Mississippi.

Mima Boskov from South Africa plaster bats

​Mima Boskov is a South African potter who completed the Understanding Porcelain e-course of Antoinette Badenhorst at Teachinart.
She learned in the online workshop how to make a plaster bat for her pottery wheel and then she decided to create her own version of the plaster bat. That is why TeachinArt is a platform for Artists who teach Artists. Mima is a typical example of one of the success stories of online teaching.

Here is Mima's explanation in her own words.

I took up pottery a few years ago, in an attempt to discover my Creative Self, liberate the Inner Child, find the Artist Within - ah, you've heard it all before: mid-life crisis and how to solve it...

I've been wedging, throwing, despairing, buying books, Googling and reading articles with genuine passion ever since. 

I'm still waiting for the Artist, but I've revealed a determined Artisan Within, and sure have hatched an Inner Gyro Gearloose (for the younger among us, that's the whacky inventor from Donald Duck cartoons). The hatchling grew out of my frustration with relatively poor choice of pottery tools in South Africa: no Mudtools, no Griffin Grip, no Strongarm centering tool, no plaster bat mold systems... So many tempting goodies that one can glimpse on internet pages, but can't source locally. Ordering online involves shipping and import duties, and the price becomes extravagant.

There is an Afrikaans saying in my country: "'n Boer maak 'n plan".

It literally means "the farmer makes a plan", but is used when lateral thinking helps one find a novel and ingenious way of surmounting an obstacle.

I realized that being the Boer with 'n plan and making my own pottery tools gives me almost as much pleasure and sense of achievement as making pots.

We needed plaster bats for the Understanding Porcelain course. I had been trying to develop a plaster bat system for my wheel for a while, and a detail from Antoinette's drawing made everything click together. 
Mima Boskov is a South African potter who completed the Understanding Porcelain e-course of Antoinette Badenhorst at Teachinart.
She learned in the online workshop how to make a plaster bat for her pottery wheel and then she decided to create her own version of the plaster bat. That is why TeachinArt is a platform for Artists who teach Artists. Mima is a typical example of one of the success stories of online teaching.

Here is Mima's explanation in her own words.

I took up pottery a few years ago, in an attempt to discover my Creative Self, liberate the Inner Child, find the Artist Within - ah, you've heard it all before: mid-life crisis and how to solve it...

I've been wedging, throwing, despairing, buying books, Googling and reading articles with genuine passion ever since. 

I'm still waiting for the Artist, but I've revealed a determined Artisan Within, and sure have hatched an Inner Gyro Gearloose (for the younger among us, that's the whacky inventor from Donald Duck cartoons). The hatchling grew out of my frustration with relatively poor choice of pottery tools in South Africa: no Mudtools, no Griffin Grip, no Strongarm centering tool, no plaster bat mold systems... So many tempting goodies that one can glimpse on internet pages, but can't source locally. Ordering online involves shipping and import duties, and the price becomes extravagant.

There is an Afrikaans saying in my country: 'n Boer maak 'n plan.

It literally means "the farmer makes a plan", but is used when lateral thinking helps one find a novel and ingenious way of surmounting an obstacle.

I realized that being the Boer with 'n plan and making my own pottery tools gives me almost as much pleasure and sense of achievement as making pots.

We needed plaster bats for the Understanding Porcelain course. I had been trying to develop a plaster bat system for my wheel for a while, and a detail from Antoinette's drawing made everything click together. 
Picture
Rubber grommet
​For my plaster bats, I used two pieces of dowel (10 mm diameter dowel - matching the diameter of wheel pins - cut to 15 mm length), and a lucky find from a hardware store, electrical department, called "rubber grommet". I have no clue what is it actually meant to be used for, but I browse hardware stores with enthusiasm that normal females reserve for shoe shops, always on a lookout for useful parts for my various projects.
Picture
Dowels with the rubber grommet
Picture
​Before assembling it, I attached a clay coil to the edge of plastic bat, and built it into a thin wall (that came from Antoinette's drawing). ​​Sunlight dishwashing liquid is a good mold release
​I inserted wooden dowels in the plastic bat holes, and put grommets on them. ​For my 25 cm plastic bat, I used 500 ml of water, and as much plaster as water would hold, and poured it on the bat. ​
Picture
Picture
After half an hour, the clay wall can be taken off, and the plaster smoothed out with a metal ruler. The sides can be tidied up with a Sureform blade and green scouring pad.
Picture
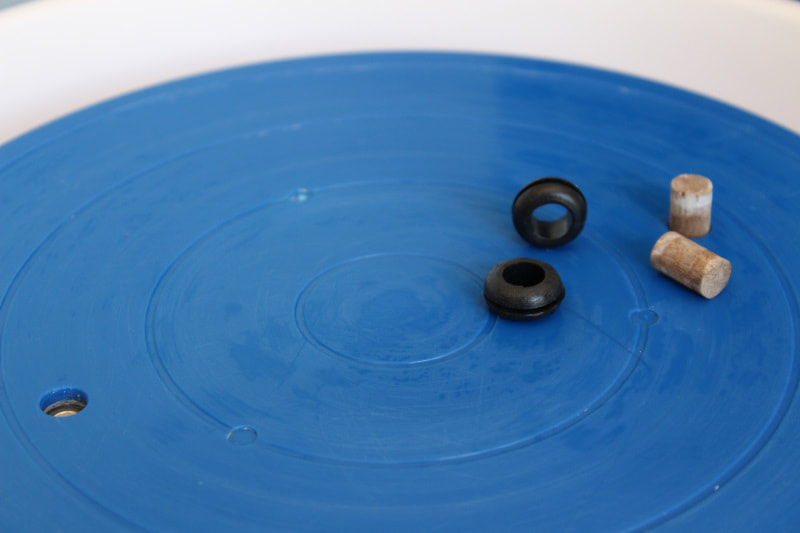
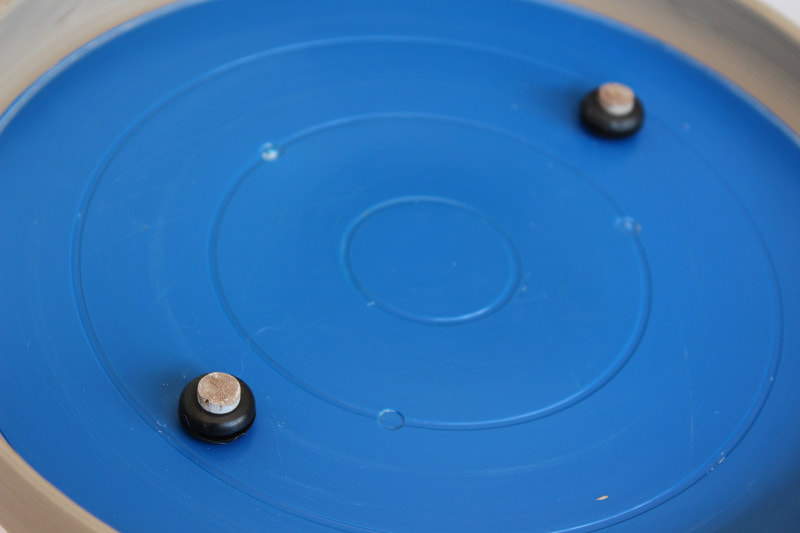
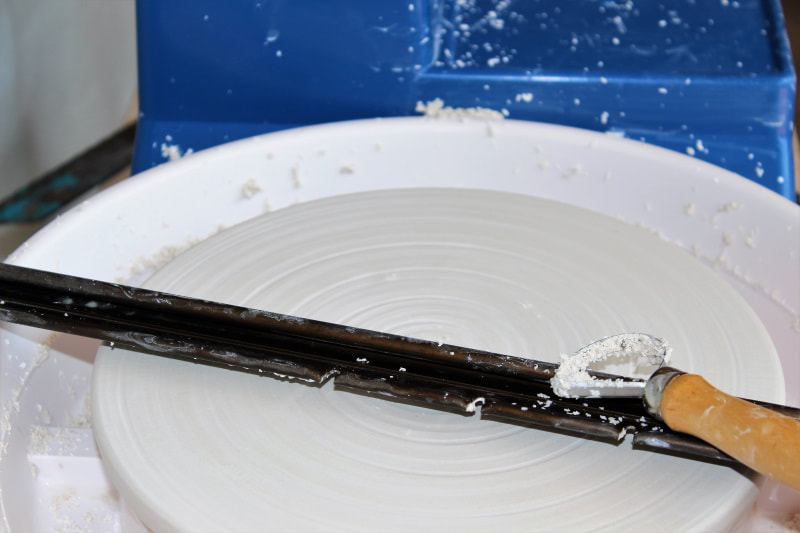
​​In another half hour, plaster can be taken off the plastic bat, using a thin spatula. After removing the dowels, the rubber grommets stay safely embedded in the underside of the bat, so the whole thing can be attached to the wheel head pins, and reused many times without damaging the plaster. A thin rubber mat on the wheel head helps secure the bat

Links:
E-courses at TeachinArt
Art instructors at TeachinArt
Preview e-course
Demonstrations & tips
Tags:
​#potterywheel #wheelthrowing #wheelbats #teachinart #teachingpottery #ceramicschool #teachingpottery
2 Comments

Tips for cutting wood segments

9/28/2019

10 Comments

 
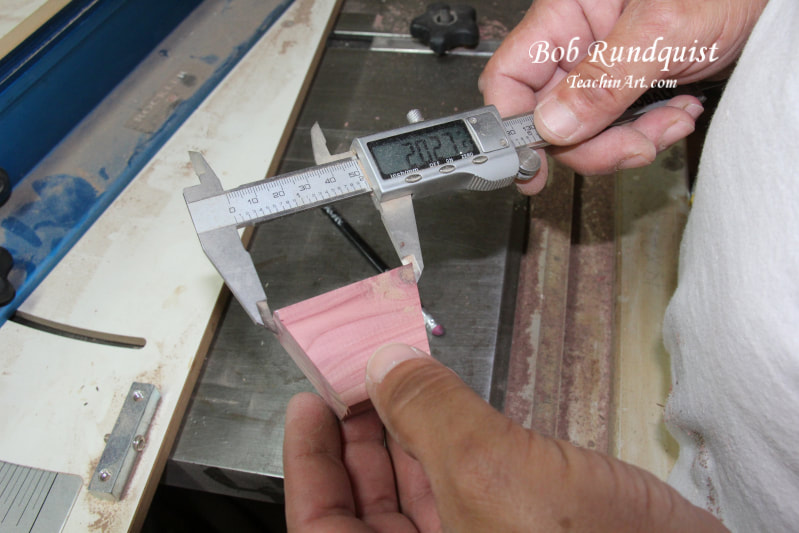
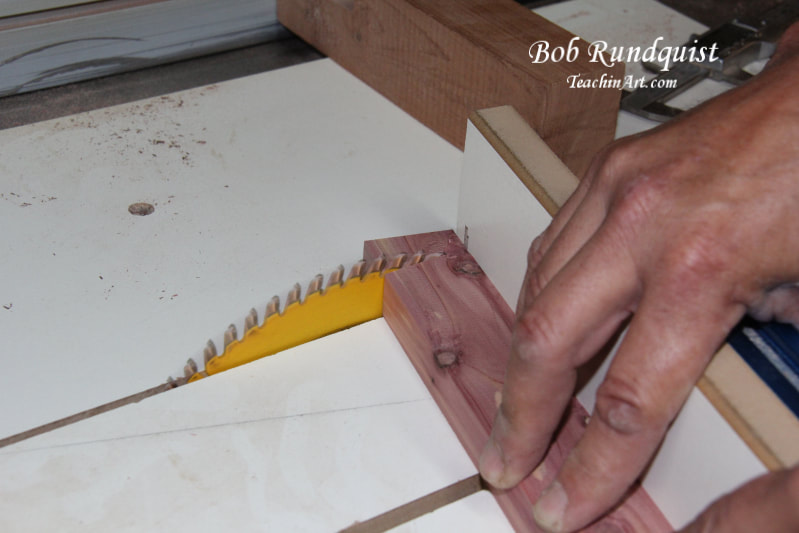
Bob Rundquist is a woodworking artist from Saltillo in Mississippi who presents an online workshop (Introduction to segmenting) where he demonstrates how to do closed segmenting. This segmenting class is for beginners, but seasoned woodworkers may get several handy tips from this virtual class.
Picture
The golden rule of woodworking: "Measure twice, cut once".

Cutting wood for lovely wood segmented projects is not just about measuring, but safety for the woodworker as well. The smaller the segments, the more dangerous to cut. When you work with precious wood and/or colorful expensive wood, then you do not want to waste any of the wood. That brings the question of what to use for cutting the wood.
​The table saw can be your biggest friend if you know how to get zero clearance when cutting segments. Accidents do happen, but you can minimize the possibilities if you follow the advice of Bob Rundquist in this video.
When you work with any power tools, be on the alert the whole time. Accidents happen easily when you do not pay attention.

Picture

Links:
E-courses at TeachinArt
Tips and demonstrations
Introduction to segmenting
Tags:
​#cuttingwood #woodsegments #segmenting #woodworkers #woodworking #woodworkingtips #safecutting
10 Comments

Understand pottery glazing

9/28/2019

0 Comments

 
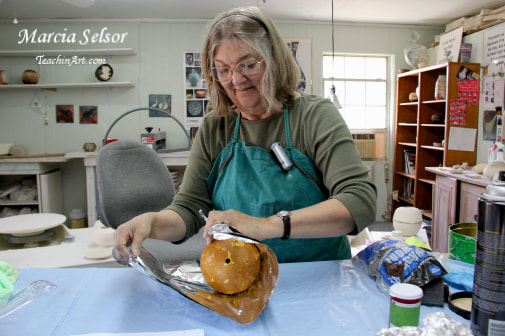
Antoinette Badenhorst explains with kitchen ingredients what happens in the pottery kiln with the ceramic glazes that potters use on their ceramic items. Colors that you normally see on the pot before it is fired is not necessarily the color that you will see when the pot is fired. 

Links:
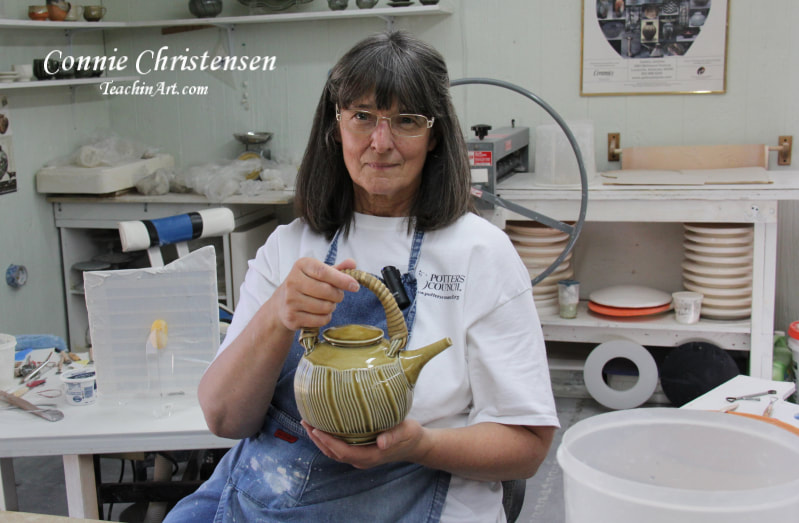
Demonstrations, tips & techniques for ceramic artists
E-courses at TeachinArt
Glazing made easy e-course with Antoinette
Shino glazing with Connie Christensen
Our Art Instructors
Tags:
#potteryglazes #ceramicglazes #glazingpottery #understandglazes #ceramicschool #teachinArt
0 Comments

TeachinArt is an online school of art

9/23/2019

0 Comments

 
Picture
Koos & Antoinette, founders of TeachinArt online school of art

What is TeachinArt?

TeachinArt is an online school of art that was founded by Koos and Antoinette Badenhorst in 2015 in Saltillo Mississippi. Teachin is the way the Mississippians pronounce teaching and was a good starting point for a online school that originated in the South, but is also pronounced as teach-in-art.
​

In 2015, the couple were teaching only Antoinette's porcelain e-courses from their website PorcelainByAntoinette. Antoinette's international students requested a greater variety of online workshops and suggested adding multiple professional artists to the school.

​What triggered the creation of the school? 

In 2013 Koos and Antoinette moved back from Chicago to Saltillo Mississippi, the first place they called home after moving to the United States in 1999. They looked at each other one day while still in Chicago, asking themselves what is the most important thing that Americans may need. They came to the conclusion that 3-dimentional (critical) thinking is in a serious decline. In a world in which Walmart and Home Depot with ready made products rule, it becomes harder to think creatively. They decided to explore online teaching of the arts.

When they started with the idea of creating an online class, they did not know where to begin and did not know if it may work; clay is such a tactile activity.

What is the objective of teaching an online school?

The couple wanted a platform where students can learn at their own place and their own time from a computer of their choice, while having direct access to the instructor for expert answers to student questions. They wanted to offer non-credit classes, with the content and substance of a college curriculum.
Antoinette's first e-class was Understanding Porcelain. This e-learning idea was very successful and they followed up with more pottery classes, some of which are not related to porcelain. Soon they received requests from their international art students for more specific workshops.
They realized then that there is big demand for professional online training where students can afford the teaching and do it from the comfort of their own place. No travel costs, no expensive workshop fees, being close at home and they can do it on their own time without sacrificing any of their existing project at home. They were on their way to an Online School of Art. With Antoinette as the only instructor, they had wide open opportunities to bring in more instructors. 
Picture
Picture
​David Voorhees from North Carolina joined the team with his 40 years of ceramics and teaching experience and in February of 2016 his workshop Porcelain tips for wheel pottery was recorded in Antoinette's porcelain studio in Saltillo Mississippi. David brought an interesting new challenge to the porcelain potters and shared with them different projects that really challenged their skills.

​The re-known Marcia Selsor who taught art at the Montana State University as well as the University of Texas became part of the teaching team when her 
Alternative Firing workshop was recorded in June 2016 in Antoinette's studio.

​Marcia shows students how to make their own raku kiln and use it then to do obvara, raku, ceramic and foil sagger firings.
Picture
Picture
​To close a very good year, Connie Christensen from Colorado came to the recording studio in October 2016 and presented her Faceted Teapots class that opened for registration in early 2017.

During the past 2 years they offered almost 400 classes to 250 international students.

​How are classes presented to the students?

​The classes are presented as videos that are supplemented with reviews, sketches and images. Questions from students are answered by the teachers and shared with all the students. Each week of an e-course represents about one day of a traditional hands-on workshop. They recommend students to follow all the steps and projects of the instructions and to create the projects in the convenience of their own workplace at their own pace. Students can choose to do the projects or just follow the demonstrations.

During the recordings of the classes, instructors and videographer pay special attention to details. Students can see hand positions and actions close-up and from all angles. TeachinArt online classes differ from YouTube videos and DVD’s because students have direct access to the teachers for the duration of the workshop. Students can ask questions about any part of the videos, in the same way they would in a regular workshop. 

Students may present images of their work or share personal problems regarding the work for commentary to the instructor. All students have the opportunity to mingle with other students while the class is running and have access to the group for as long as they choose.

Antoinette said "We are still in our infant shoes, with so much to learn, but this way of distant learning benefit students who work full time or who cannot attend a traditional workshop for some or other reason."

There is a gap of education between college trained artists and hobby artists. Therefor TeachinArt pay painless attention to creating quality courses for students who are interested in expanding their knowledge and expertise in the visual arts, without having to work through an extensive college curriculum.

With the first 2 years behind, 2017 is the first year that the school started overlapping classes in an effort to offer continuity in the programs. If everything works out according to the plan, they will produce between 6-10 new classes this year and hope to start adding jewelers, painting artists, sculptors and other fine arts and crafts in the near future.

Links:
E-courses at TeachinArt
Art teachers at the online school
Preview the e-courses
Tags:
#teachinart #marciaselsor #Antoinettebadenhorst #davidvoorhees #conniechristensen #teachingpottery #ceramicartists #USApotters #Mississippiartists
0 Comments

Throwing, carving and altering porcelain

9/5/2019

0 Comments

 
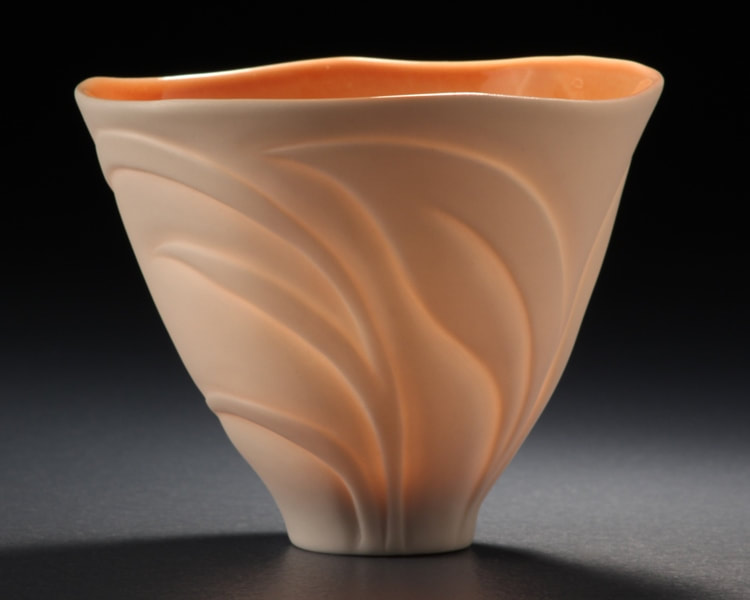
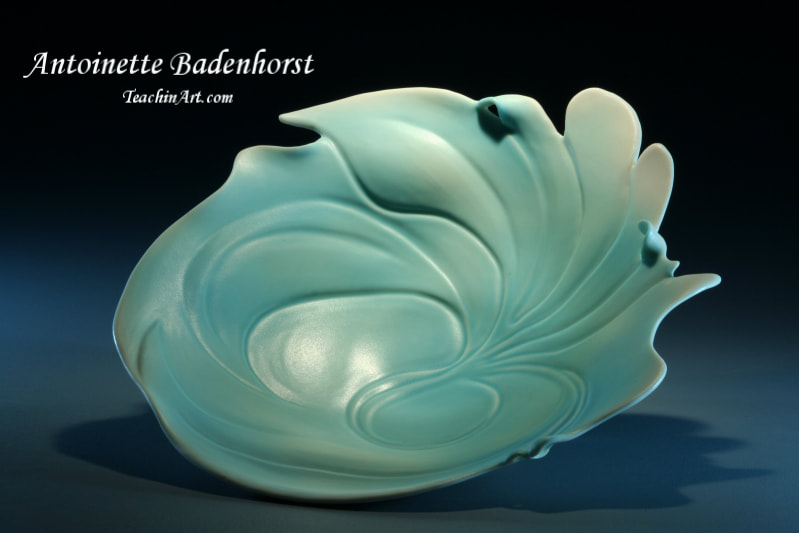
One of TeachinArt online teachers, Antoinette Badenhorst presented a hands-on workshop at the Pottery Studio in Bryanston South Africa where she demonstrated the carving and altering process of porcelain.

She calls porcelain the "Diva of clay" and tells her students that they have to understand the character of the clay to really push it to it's limits.
Picture
Wheel thrown porcelain bowl, carved and altered, and then spray painted with Antoinette's own glazes.
Here are some of the characteristics of porcelain.
  • When fired correctly, porcelain has a glass like or marble appearance.
  • Porcelain has a weak green strength and should therefore be handled with the utmost care before the firing process.
  • Porcelain becomes very pyro-plastic (soft because of the heat) at a high temperature. Any thinner parts will collapse when pulled down by the weight of the heavier or thicker parts. It will easily warp or slump during firing. Potters will often times create ways to support a porcelain piece during the firing process to prevent deformation or make sure that the construction is very evenly done and well designed.

Links:
Understanding porcelain e-course with Antoinette Badenhorst
Porcelain handbuilding online workshop with Antoinette Badenhorst
E-courses (online classes) at TeachinArt
Demonstrations, tips and techniques
Preview e-courses
Tags:
#teachinart #wheelthrowing #teachingartist #carvingporcelain #alteringporcelain #porcelainplatter #divaofclay #ceramicschool #clayshares
0 Comments

    Author

    TeachinArt is an online art school with professional artists as instructors who educate, enridge and promote art.

    Categories

    All
    Alternative Firing
    Artists
    Bone China
    Carving Clay
    Centering Clay
    Clay Sculpting
    Colored Clay
    Decorating
    Demonstrations
    Glazing
    Handbuilding
    Mixed Media
    Painting On Clay
    Paper Clay
    Pinching Clay
    Porcelain
    Pottery Glazing
    Pottery Tips
    Raku
    Slip Casting
    Soluble Salts
    South African Artist
    TeachinArt Students
    Teapots
    Trimming
    Weaving
    Wedging
    Wheel Throwing
    Woodworking Tips

    Archives

    March 2023
    March 2022
    December 2021
    March 2020
    February 2020
    January 2020
    December 2019
    November 2019
    October 2019
    September 2019
    August 2019

    RSS Feed

Links to other pages

Home
Online workshops
Our Instructors
Registered Students
Tips & Demos
Behind the scenes
Student's work
FAQ
Reviews

Workshops by categories

Wheel thrown classes
Handbuilding classes
Teapot classes
Porcelain dinnerware classes
Glazing & decorating classes
Woodworking
©2020 TeachinArt
All rights reserved
About Us
Contact Us
Webmaster: Koos Badenhorst
  • Home
  • Online workshops
    • AAMAL (All Artists Making A Living) >
      • Success stories
    • Alternative firing
    • China painting
    • Colored clay
    • Faceted Teapot set
    • Glazing made easy
    • Glazing with Ron Roy
    • Handbuilding porcelain dinnerware
    • Handbuilding Pottery For Beginners
    • Introduction to segmenting
    • Pinching Teapots for Beginners
    • Porcelain handbuilding
    • Porcelain Tips for Wheel Pottery
    • Post-fired finishes
    • Sculpted Clay Creatures
    • Shino glazing
    • Take throwing to the next level
    • Understanding Porcelain
    • Wheel thrown porcelain dinnerware
    • Wheel thrown teapots
  • Instructors
    • Antoinette Badenhorst
    • Bob Rundquist
    • Connie Christensen
    • Curtis Benzle
    • David Voorhees
    • Lynn Barnwell (Guest Artist)
    • Marcia Selsor
    • Marie EvB Gibbons
    • Nan Rothwell
    • Paul Lewing
    • Ron Roy
    • Sam Clark
  • Registered students
  • Contact us
    • About us
  • Tips / demos
  • Students work
  • Blog