TeachinArt.com
  • Home
  • Online workshops
    • Understanding Porcelain
    • Handbuilding classes >
      • Porcelain handbuilding
      • Colored clay
      • Handbuilding Pottery For Beginners
    • Wheel thrown classes >
      • Porcelain Tips for Wheel Pottery
      • Take throwing to the next level
    • Teapot classes >
      • Pinching Teapots for Beginners
      • Faceted Teapot set
      • Wheel thrown teapots
    • Dinnerware classes >
      • Wheel thrown porcelain dinnerware
      • Handbuilding porcelain dinnerware
    • Glazing & Firing >
      • Shino glazing
      • Glazing made easy
      • Alternative firing
      • Glazing with Ron Roy
    • Painting on clay >
      • China painting
      • Post-fired finishes
    • All Artists Making A Living (AAMAL) >
      • Success stories
    • Woodworking classes >
      • Introduction to segmenting
    • Preview E-courses
  • Instructors
    • Antoinette Badenhorst
    • David Voorhees
    • Marcia Selsor
    • Connie Christensen
    • Nan Rothwell
    • Lynn Barnwell
    • Marie EvB Gibbons
    • Paul Lewing
    • Curtis Benzle
    • Robert Rundquist
    • Ron Roy
  • Registered students
  • Contact us
    • About us
  • Tips / demos
  • Students work
  • Blog

How to fix cracks on porcelain and pottery

3/23/2020

11 Comments

 
Picture
Antoinette Badenhorst is a ceramic artist and writer from Saltillo Mississippi who is also an online instructor at TeachinArt. She specializes in porcelain and shares some of her tips for fixing cracks with potters.
​
"After 37 years in clay I still fix pots that I love!

I know some of you will pull out the hammer, but some will want to fix it.
The most important thing any potter can do, is to find out why the piece cracked and then prevent the problem in future. However, there are ways to fix cracking."

Another important thing to consider is if it is at all worth it to fix the crack. If it will take you longer to fix the piece than it would take you to make a new one, then it will be penny-wise-pound-foolish to fix it. It is also good to learn when a crack is really not worth the effort and when it may make a real difference. Some cracks are more worthy to fix than others.

A piece that is strictly for decoration and will not get confused for a utilitarian piece, is a perfect piece to fix, both artificially and structurally; that is with or without ceramic materials. In fact, a crack that distract from the beauty, should be fixed. However, when the utilitarian strength of a piece, for instance the handle of a teapot, is weakened by the fixing process, it is not worth it to put your reputation as a ceramic artist on the line.

All potters must at least fix one crack in their lifetime, or else they have not had the “full clay experience” - I say that tongue-in-the-cheek. However, there was one potter known,  not only for fixing cracks, but she changed the whole perspective on American porcelain as she was recognized as the most important United States ceramic artist in the 20th century (Arts and Antiques magazine - March 2000).
Picture
Intended as her contribution to a program of The People's University in University City, in 1910 to make "grand, public statements in clay", the “Scarab Vase” won the Grand Prize in pottery at the Turin International Exhibition one year later. At the time American ceramics was not much acclaimed in the world, but Adelaide’s persistence to make the vase successful, changed that completely.
Picture
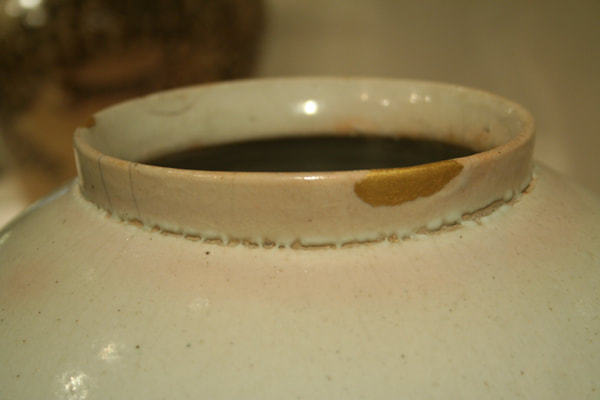
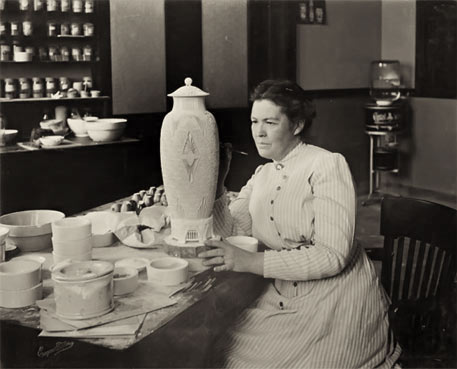
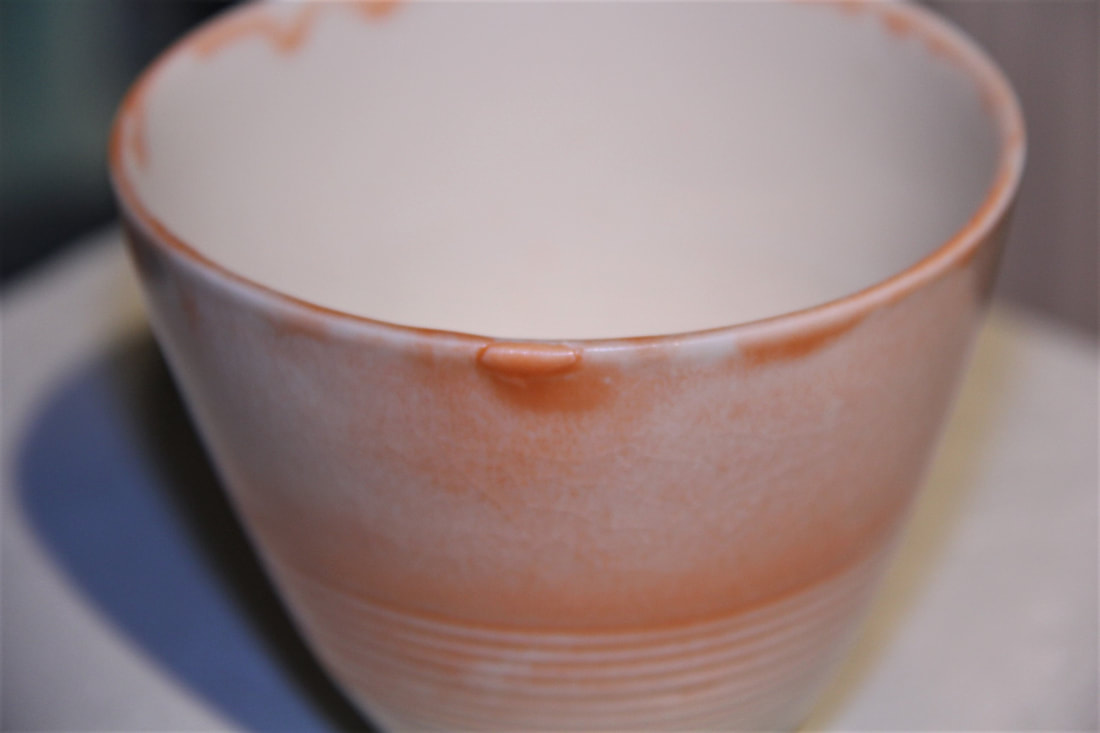
​Adelaïde Alsop Robineau was born during the last remnants of the industrial revolution in the United States and growing up, she became a painting artist. But as it often went with artists during these times, she worked also as a china painter on ceramics to help support her family.
​

One of very few women in the USA to study and practice pottery at the time, she worked primarily in porcelain, experimenting with American clay to create a true high-fire porcelain.

​It took her over 1,000 hours to make, but as it often happens with porcelain, there were small cracks when it came from the kiln. Taxile Doat, her teacher advised her to trash the piece, as it appeared to be irreparable. She did not give it up and spent hours grinding bisque to powder, mixing it with some powdered glaze, and filled the cracks. After re-glazing and re-firing, the piece was pulled from the kiln with no signs of cracks or reparation.

How does Antoinette fixes cracks in her pots?

Here is how I fix cracks: Mix up some paper clay from your clay body. Add a few drops of clear glaze and some finely grounded bisque from the same clay as the mug. Clean any dust away and add some clear glaze on the chip. As it dries, it may open up some cracks again, but keep filling it with more paper clay. Remember paper clay must still shrink to catch up with the rest of the body, so it needs enough filler that will not shrink that much.
Picture
Picture
Picture
​When you put it back in the kiln, put some silica on the shelf under the piece to prevent possible sticking. If it is a foot rim, you may have to sand it when it comes out.

Links:
Porcelain by Antoinette
E-courses (online workshops) at TeachinArt
Preview our e-courses
Demonstrations and tips
Tags:
​#potterytips #faultsandremedies #fixingfaults #teachinart #ceramicschool #paperclay #paperporcelain 
11 Comments
Antoinette Badenhorst link
2/1/2020 08:37:30 am

Hers are some more details:

Some efforts work better than others. Mix up the following:
- slip from your clay, mixed up with paper; in other words paperclay from your clay body
- a shard of bisque of the same clay, grinded finely.
- Add to it sugar or some paper hardener like cmc to act like a glue
- A flux, like one of the ( lower melting) fritts or some low firing clear glaze.

I do not have measurements. I make sure that it has enough "tooth" from paper and particularly bisque powder, is sticky enough to stick and has enough glaze( flux) to help melt the area so that it can bond. It should be like a stiff paste.

Now; open the crack so that you can push clay right through the crack. You have to find the starting place of the crack and work from there. I usually use a dremel tool for this task.

Lastly I wet the cracked area to saturation ( to prevent the bisque to swallow the moist). Then I start pushing the clay mixture through the crack, making sure that I push the air out. Leave the mixture fairly thick on both sides of the crack to harden. Scrape the areas clean just before it becomes to hard to scrape off. Sugar can make it very very hard. As the clay shrink into the crack you will have to fill it up again from two sides this time. Lately I leave a thickened line on the crack and sand it off after I re bisqued it. Sometimes the crack re appear after the 2nd bisque firing. If that happens I trash the piece. Sometimes I touch it up with the crack mender. If it make it through a 2nd bisque firing, it will make it through the glaze firing. Make sure though that you fire it on something like silica sand or some other refractory material to act like little rollers under the pot.

Reply
Diane Gee link
8/27/2020 03:01:21 pm

I had been puzzling over the safest way to collect finely ground bisque, when I stumbled across a great idea (that I now can't find to give credit to the author, so sorry.).

The suggestion was to take bone dry greenware scraps, grind them down to fine dust in a mortar/pestle, and bisque fire the dust in a small unglazed bowl. Voila! Works like a charm!

Reply
Antoinette Badenhorst link
9/2/2020 11:32:43 am

I was wondering about that, but have not tried that. It may lump, but it should work.
Another way is to take bisque shards and grind fine in the same way.

Reply
rachel frampton link
12/1/2020 07:03:31 pm

My mom accidentally dropped her clay pot, and this caused a crack in it, which is why I told her that it would be best if she'll buy a Caulk preserver solution that she may use in fixing the crack. Well, your suggestion of adding a clear glaze on the chip seems helpful as well. Thank you for also clarifying here that it is necessary to fix it with a sturdy filler.

Reply
Antoinette A Badenhorst link
7/13/2022 08:33:45 am

you're welcome

Reply
Jacquie Blondin
5/4/2022 12:05:40 pm

I ground bone dry clay, bisques it and then put it through a 80 mesh sieve. Going to try this nether out. Can you do the repair and go directly to glaze firing without the 2 bisque. I’m using stoneware.

Reply
Koos Badenhorst link
5/4/2022 10:07:55 pm

Jacquie, Antoinette is presenting a hands-on workshop at LaMeridiana in Italy. She will answer your question as soon as she gets time available.

Reply
Antoinette Badenhorst link
5/4/2022 11:28:18 pm

It is always best to first re bisque. Not only to check if the crack really mended, but also to see if it shrunk level with the rest of the wall.

Reply
jameslehner992 link
5/27/2022 07:54:18 am

I fixed my friend's pottery with this trick and it worked. Thanks for this amazing trick!

Reply
Nancy Wolf
7/11/2022 09:21:22 am

What about Amaco Bisque Fix? Will that repair cracks in glazedware?

Reply
Antoinette A Badenhorst link
7/13/2022 08:36:28 am

Nancy, I do not have experience with Amaco Bisque fix. You may want to contact them directly with your question.

Reply

Your comment will be posted after it is approved.


Leave a Reply.

    Author

    TeachinArt is an online art school with professional artists as instructors who educate, enridge and promote art.

    Archives

    March 2022
    December 2021
    March 2020
    February 2020
    January 2020
    December 2019
    November 2019
    October 2019
    September 2019
    August 2019

    Categories

    All
    Alternative Firing
    Artists
    Bone China
    Carving Clay
    Centering Clay
    Clay Sculpting
    Colored Clay
    Decorating
    Demonstrations
    Glazing
    Handbuilding
    Mixed Media
    Painting On Clay
    Paper Clay
    Pinching Clay
    Porcelain
    Pottery Glazing
    Pottery Tips
    Raku
    Slip Casting
    Soluble Salts
    South African Artist
    TeachinArt Students
    Teapots
    Trimming
    Weaving
    Wedging
    Wheel Throwing
    Woodworking Tips

    RSS Feed

Links to other pages

Home
Online workshops
Our Instructors
Registered Students
About Us
Contact Us
Tips & Demos
Behind the scenes
Student's work
FAQ
Reviews

Workshops by categories

Wheel thrown classes
Handbuilding classes
Teapot classes
Porcelain dinnerware classes
Glazing & decorating classes
Woodworking
©2020 TeachinArt
All rights reserved

Webmaster: Koos Badenhorst

  • Home
  • Online workshops
    • Understanding Porcelain
    • Handbuilding classes >
      • Porcelain handbuilding
      • Colored clay
      • Handbuilding Pottery For Beginners
    • Wheel thrown classes >
      • Porcelain Tips for Wheel Pottery
      • Take throwing to the next level
    • Teapot classes >
      • Pinching Teapots for Beginners
      • Faceted Teapot set
      • Wheel thrown teapots
    • Dinnerware classes >
      • Wheel thrown porcelain dinnerware
      • Handbuilding porcelain dinnerware
    • Glazing & Firing >
      • Shino glazing
      • Glazing made easy
      • Alternative firing
      • Glazing with Ron Roy
    • Painting on clay >
      • China painting
      • Post-fired finishes
    • All Artists Making A Living (AAMAL) >
      • Success stories
    • Woodworking classes >
      • Introduction to segmenting
    • Preview E-courses
  • Instructors
    • Antoinette Badenhorst
    • David Voorhees
    • Marcia Selsor
    • Connie Christensen
    • Nan Rothwell
    • Lynn Barnwell
    • Marie EvB Gibbons
    • Paul Lewing
    • Curtis Benzle
    • Robert Rundquist
    • Ron Roy
  • Registered students
  • Contact us
    • About us
  • Tips / demos
  • Students work
  • Blog